

Open a trunk with its pencil button and select 2. Advanced, or continue from the creation form. Use values supplied by your carrier. The screenshots show the unsaved custom-carrier form.
1. Check the connection
Set Transport and Port. Fill in From domain, outbound proxy, From user, Contact user, Match IP and Match port only where your carrier requires them.
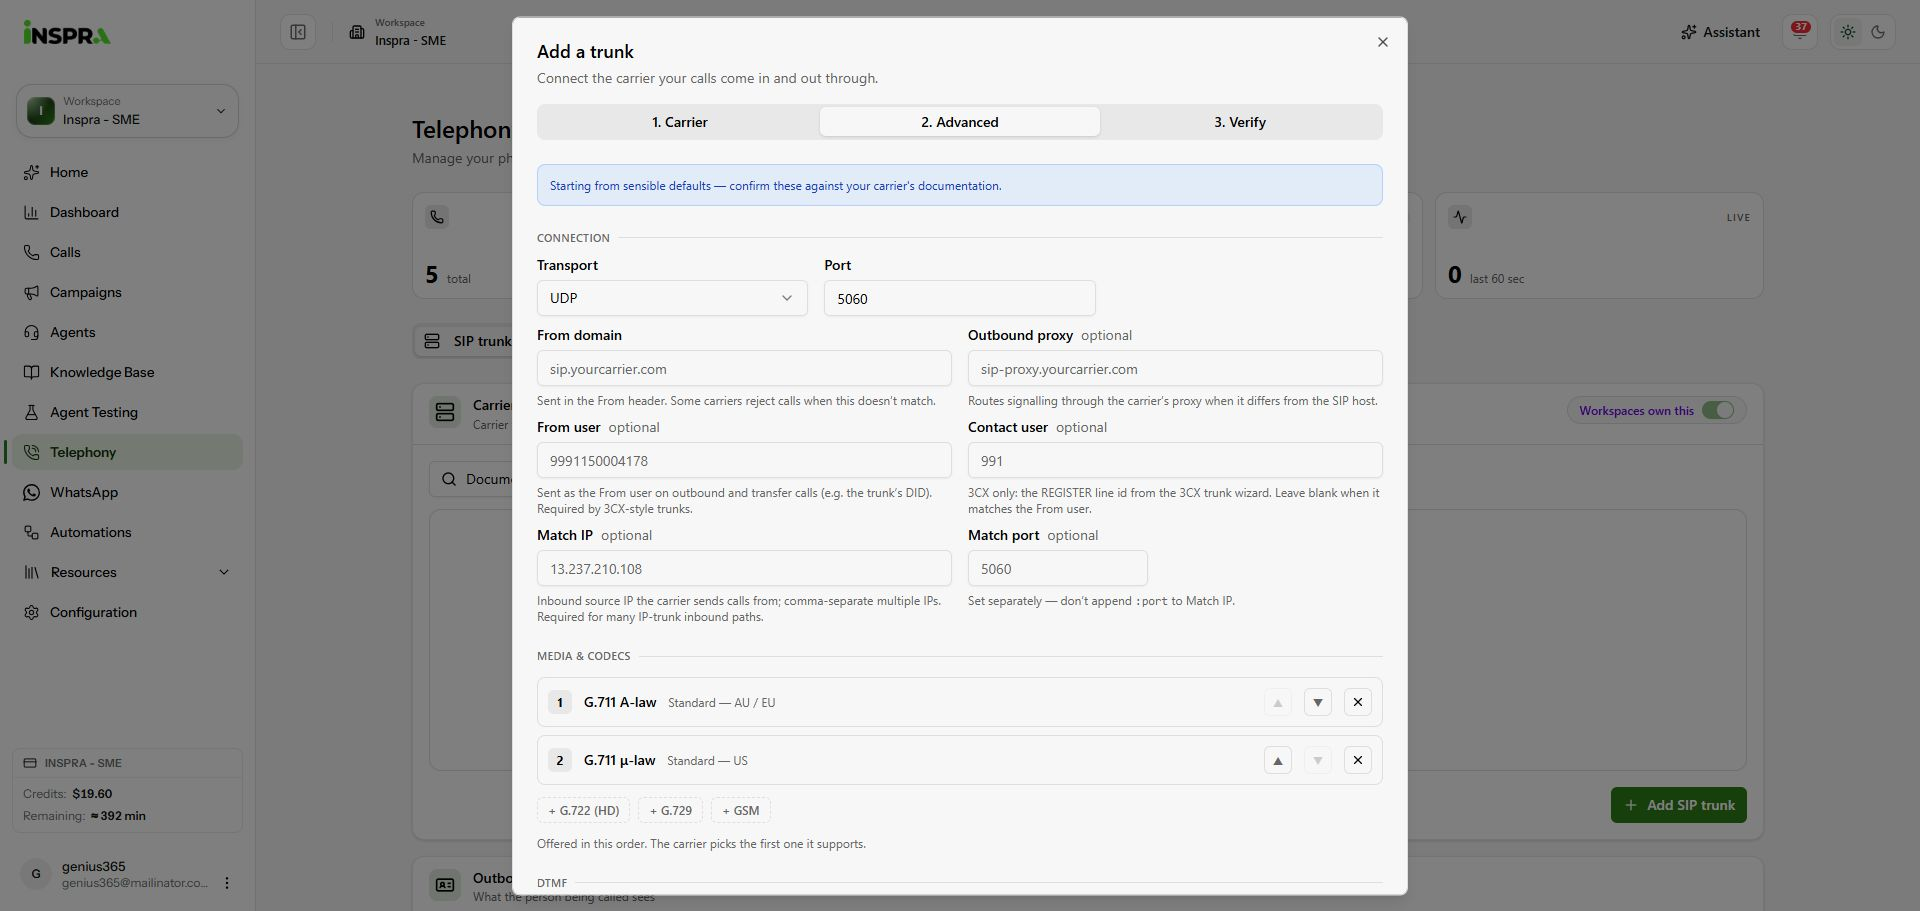
Advanced connection fields and the beginning of codec settings. 2. Review media and number formatting
Order the supported Codecs using the arrows and add or remove codecs to match your carrier. Choose the required DTMF method. Review outbound caller ID and the inbound/outbound number formats. Controls marked as organisation-managed must be changed by your organisation administrator.
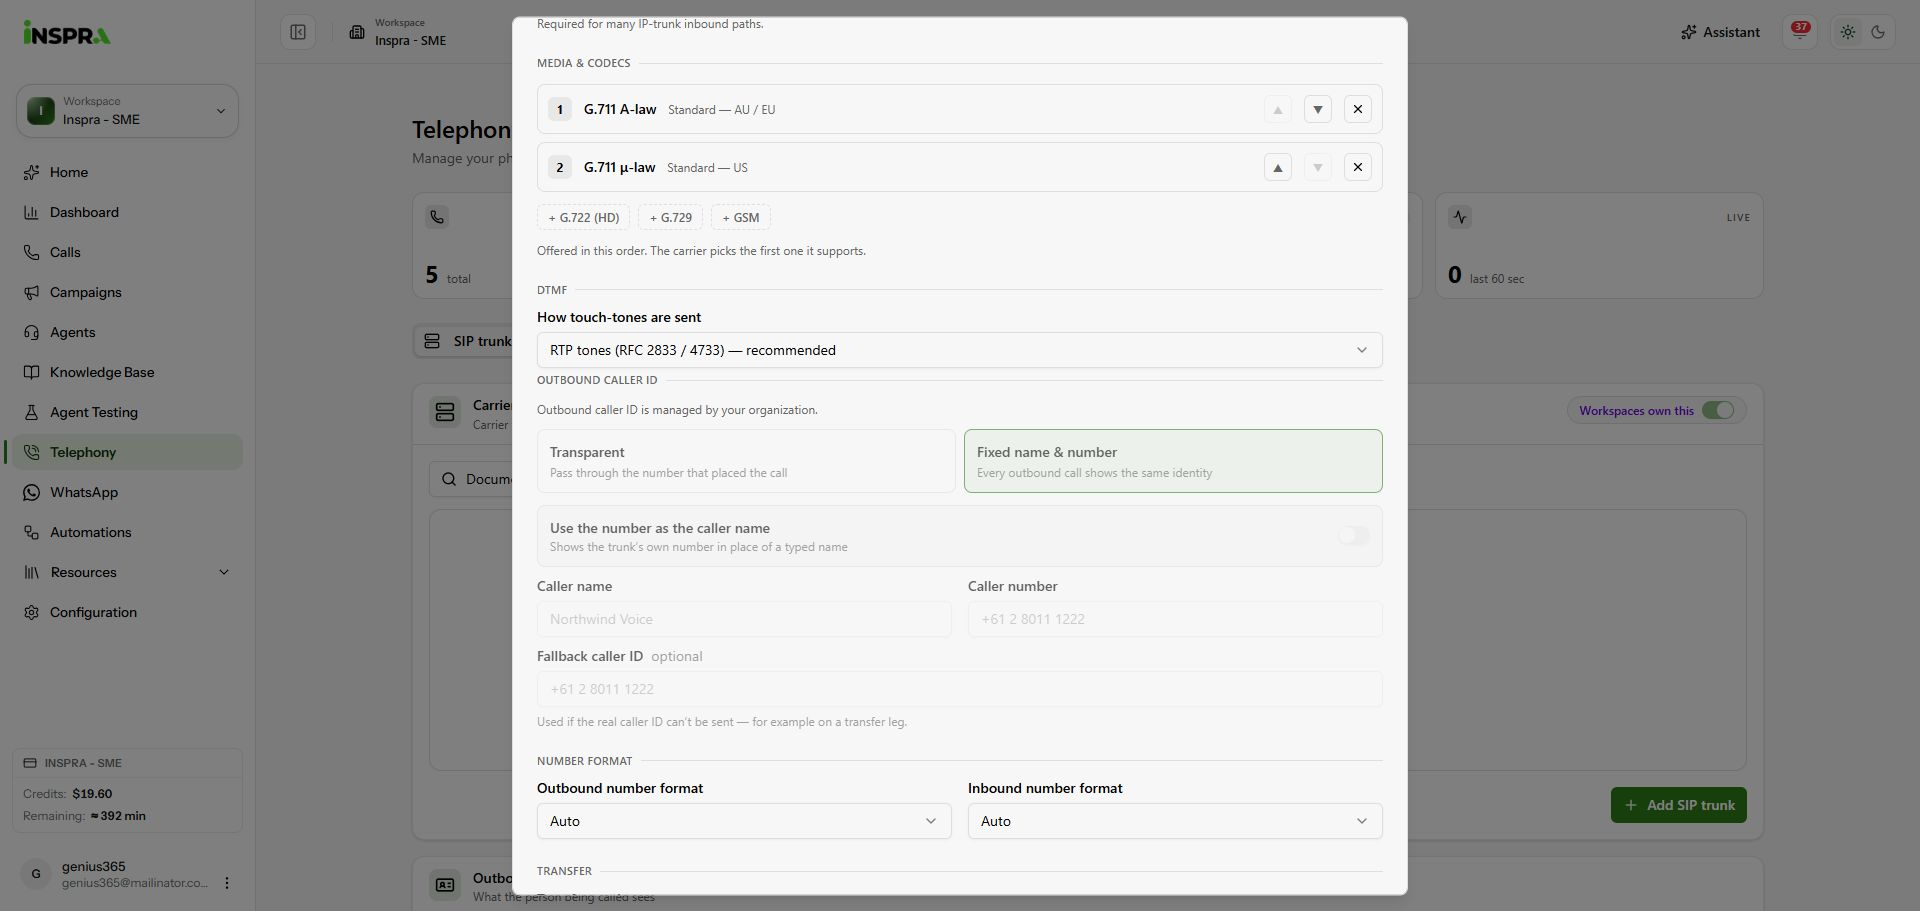
Codec priority, DTMF, caller ID and number formatting. 3. Review transfers, headers and capacity
Choose the carrier-supported Transfer mode: SIP REFER, Bridge or Re-INVITE. Review whether transferred calls need a separate recording. Check the SIP header switches and set Max concurrent calls if a limit is required. Click Save trunk after reviewing your changes.
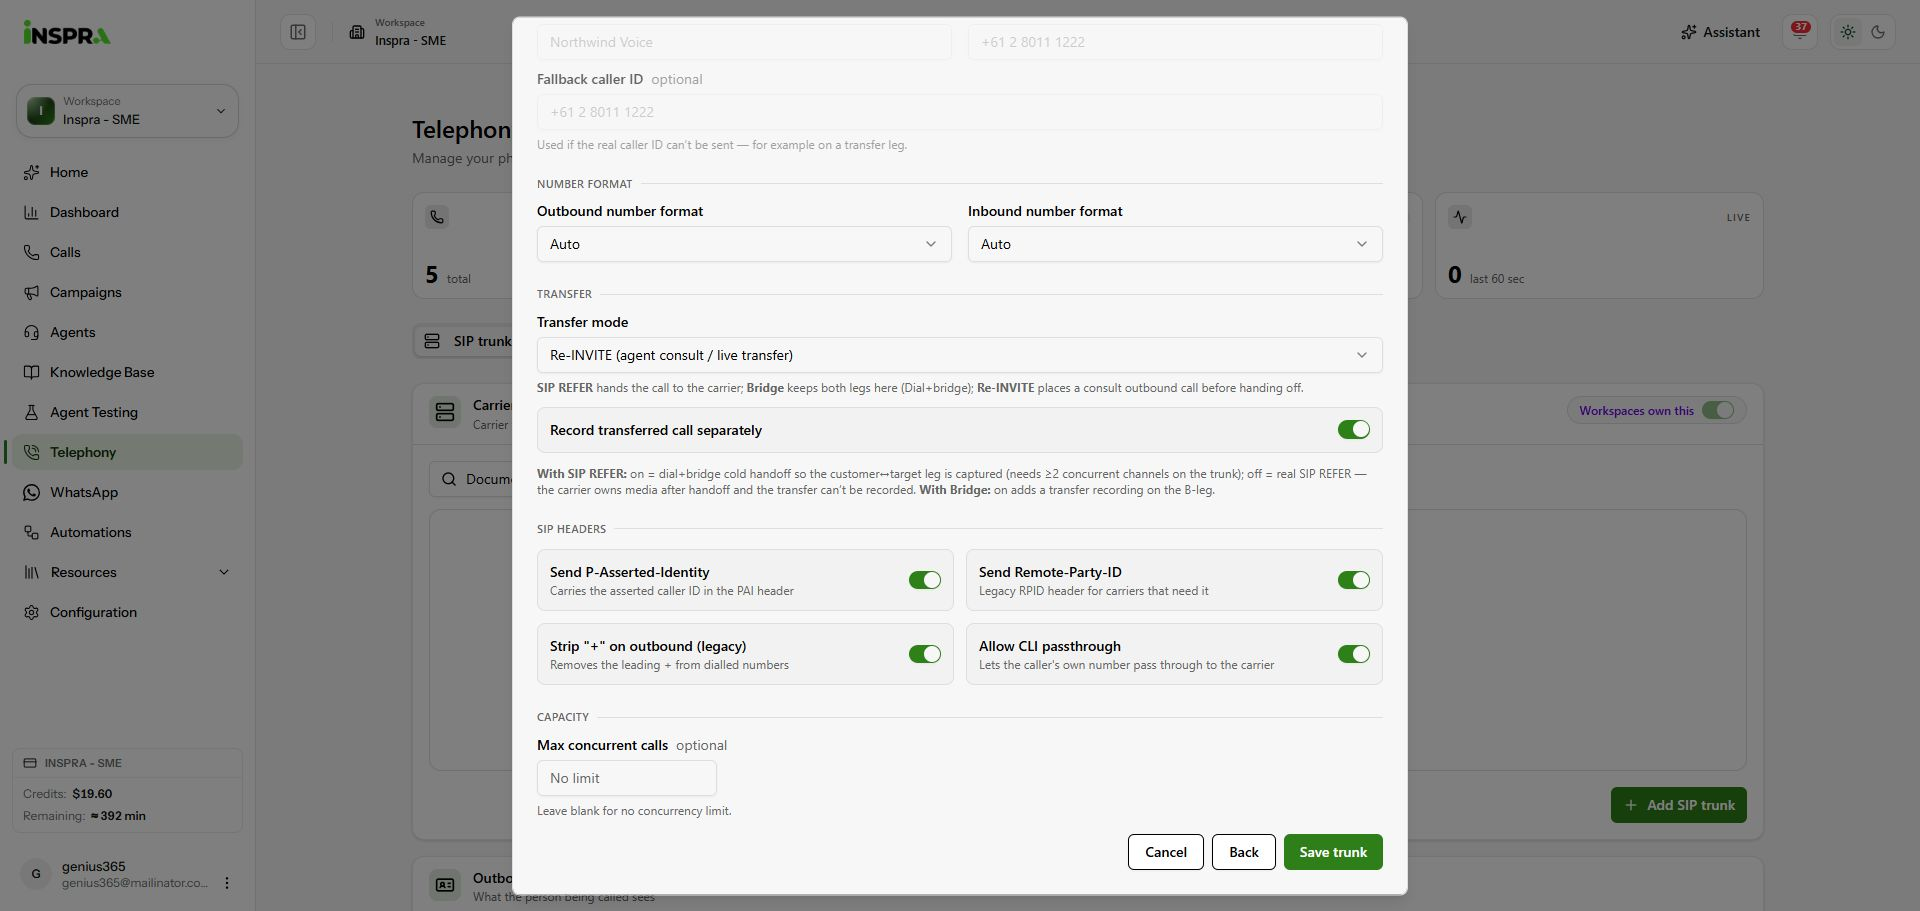
Transfer options, SIP headers, capacity and Save trunk. 4. Check registration and peering
Open 3. Verify. Give your carrier the addresses under Allow our network and click Run check after the trunk has been saved. Review the result before using the trunk for calls; the screenshot shows the unsaved state.
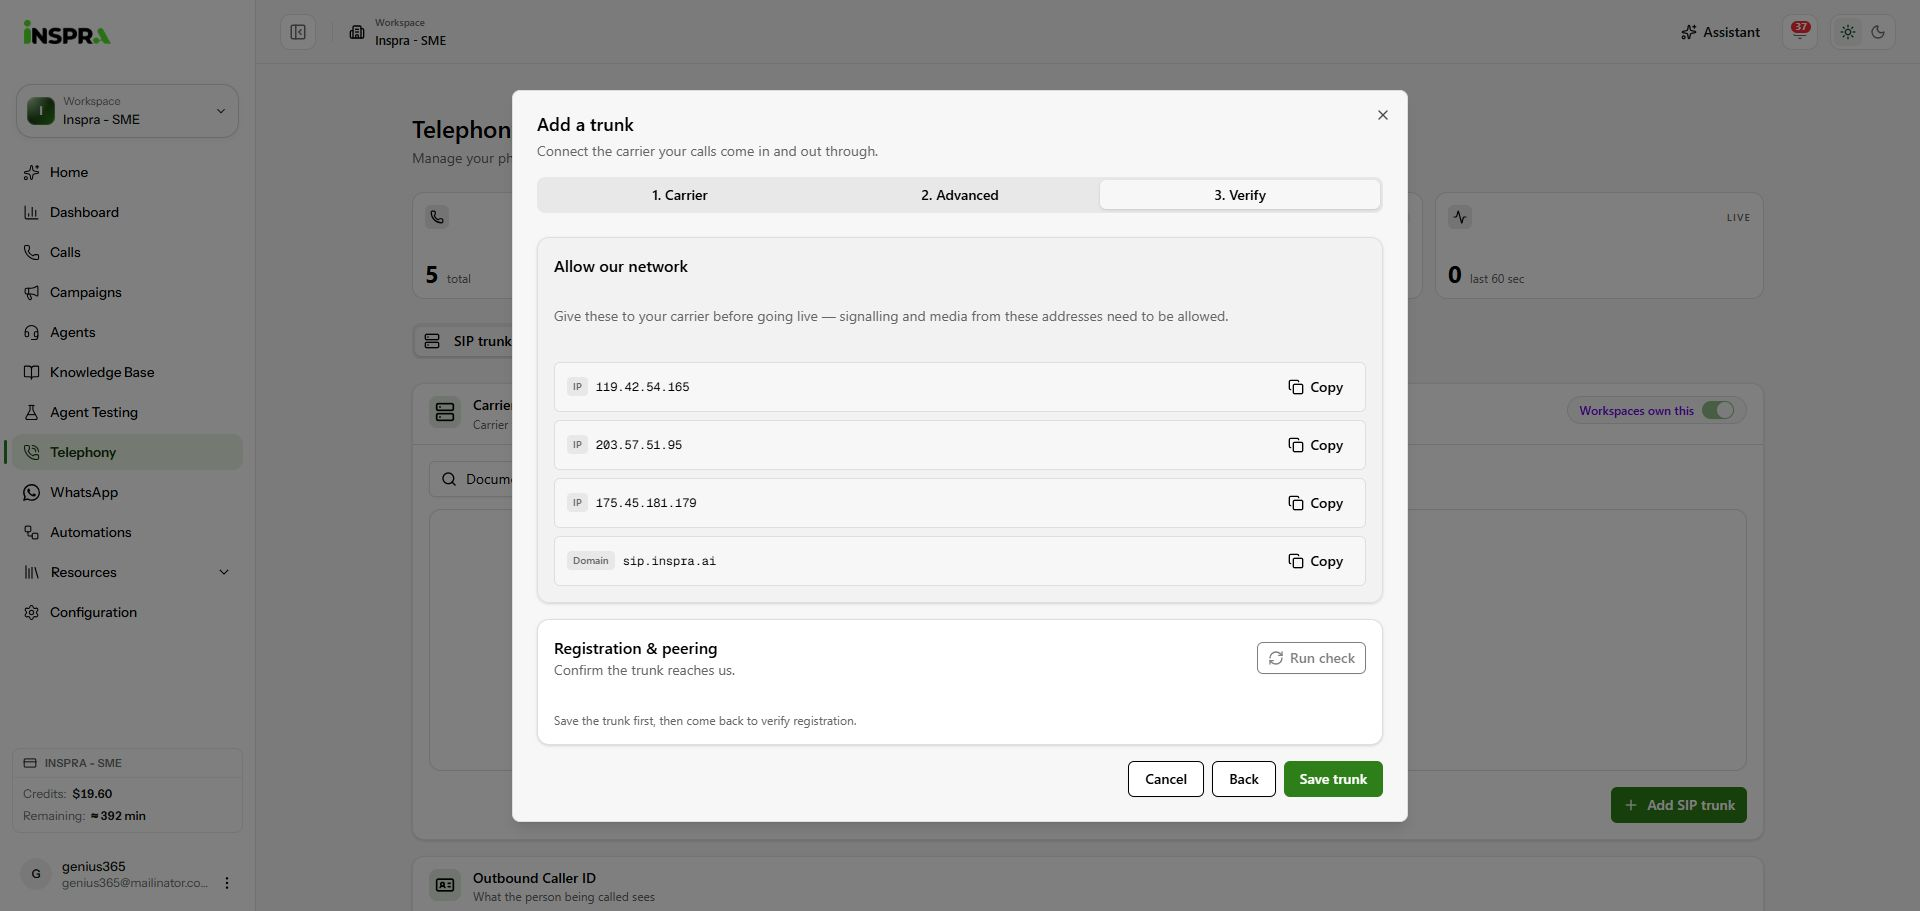
Network allowlist and the save-first registration check.