

Have an existing number from your carrier and a configured SIP trunk ready. This form adds the number to your workspace; it does not purchase a number. The screenshots show an unsaved form.
1. Open Add phone number
Go to Telephony → Phone numbers and click Add phone number.
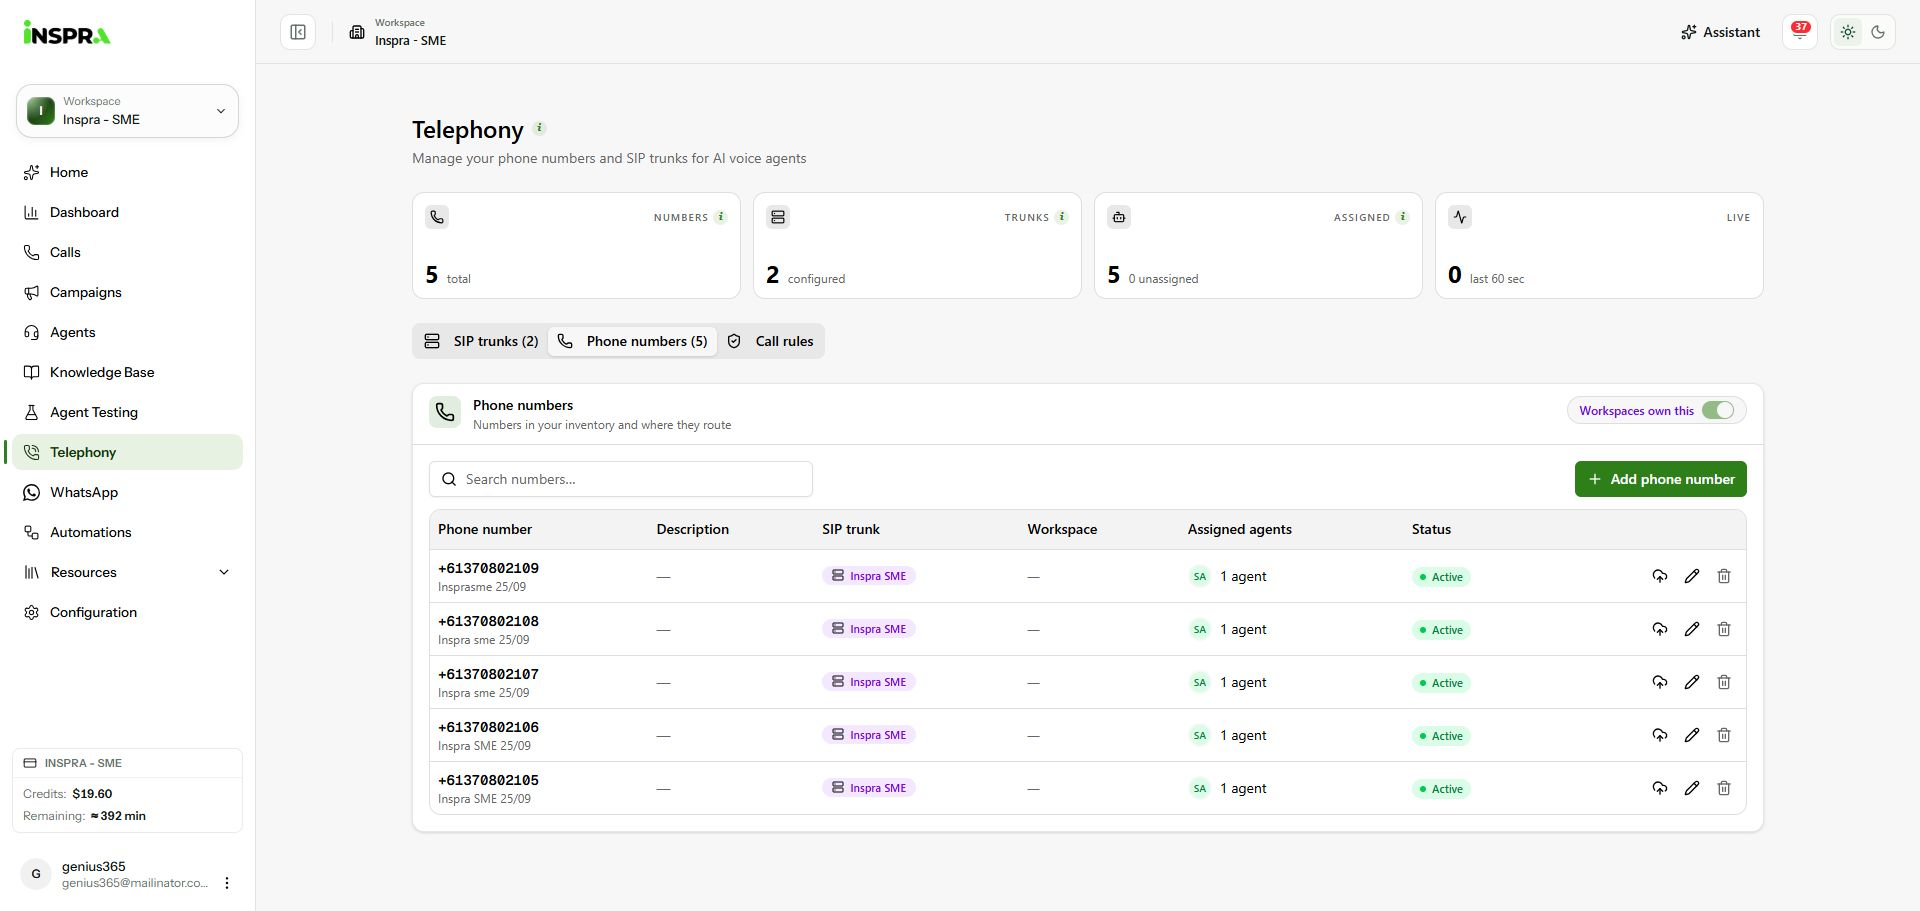
Open Phone numbers and select Add phone number. 2. Enter the number and trunk
Enter the Phone number in international format, a Friendly name and the SIP trunk that provides it. Select the Inbound agent when calls should go to an agent. Enable Inbound calls, Outbound CLI and SMS capable only for the capabilities your carrier provides.
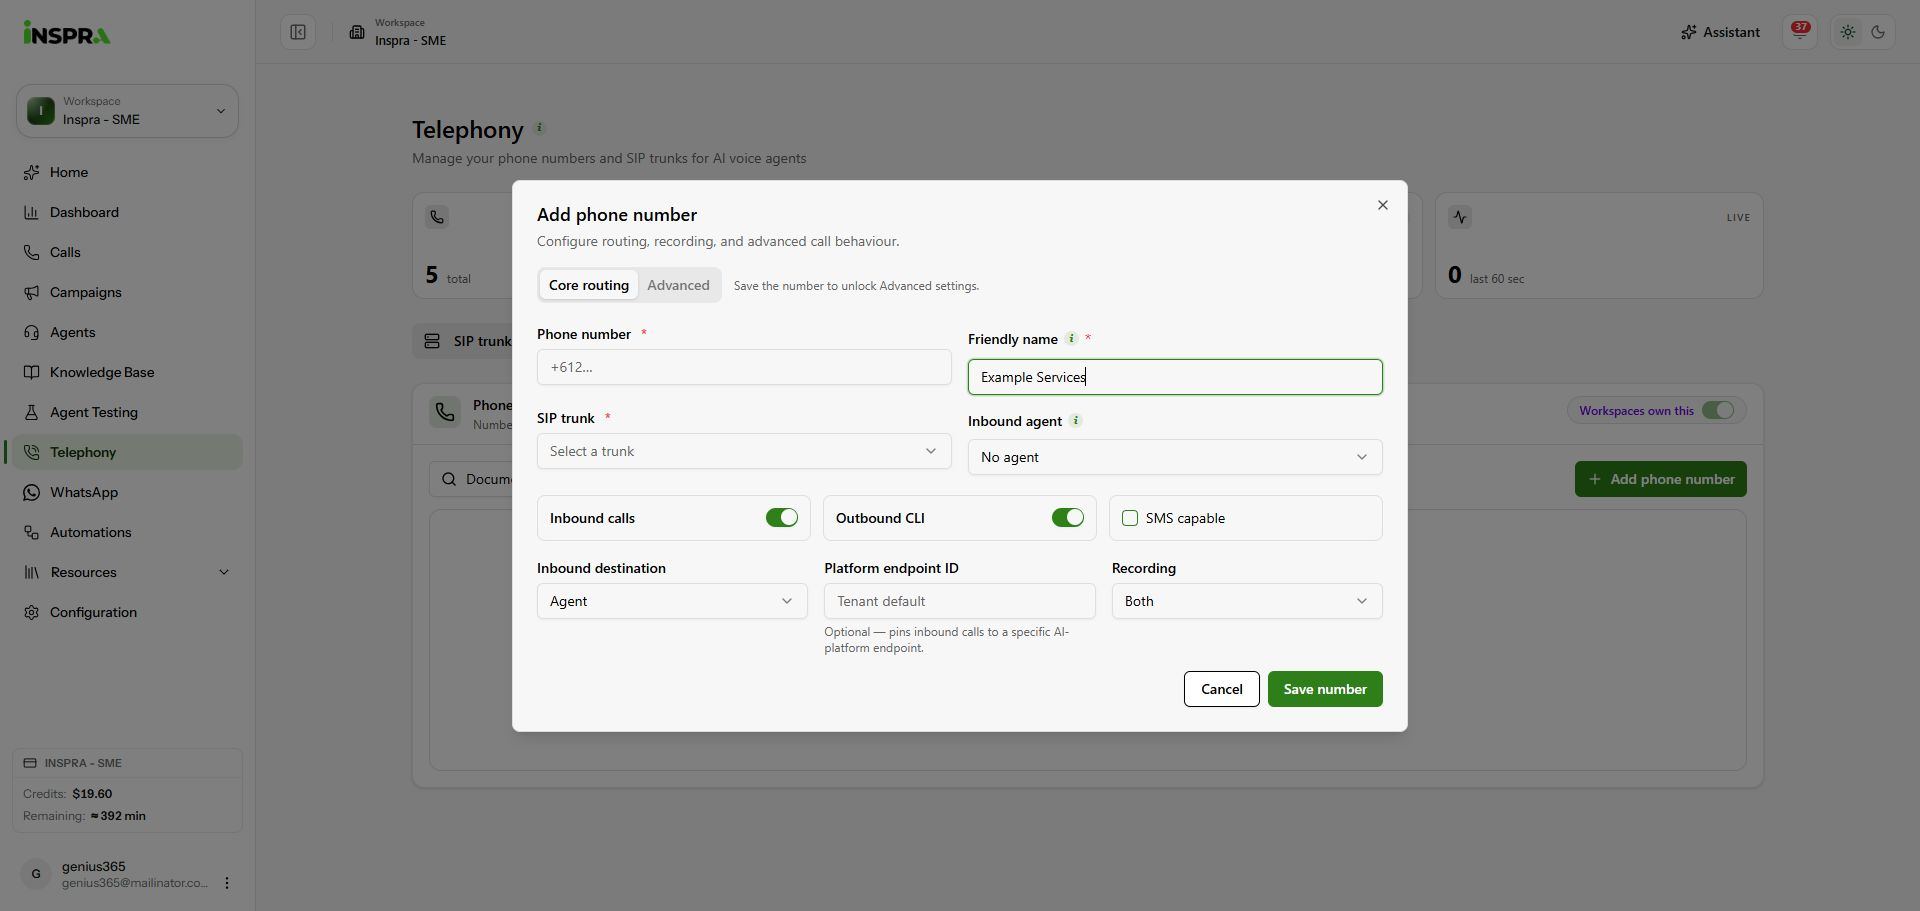
Core routing form with the example friendly name; number and trunk are still unfilled. 3. Choose where inbound calls go
Set Inbound destination to Agent, Person / extension, External number or SIP URI. Fill in the destination fields that appear. For Agent, select the inbound agent; the Platform endpoint ID is optional.
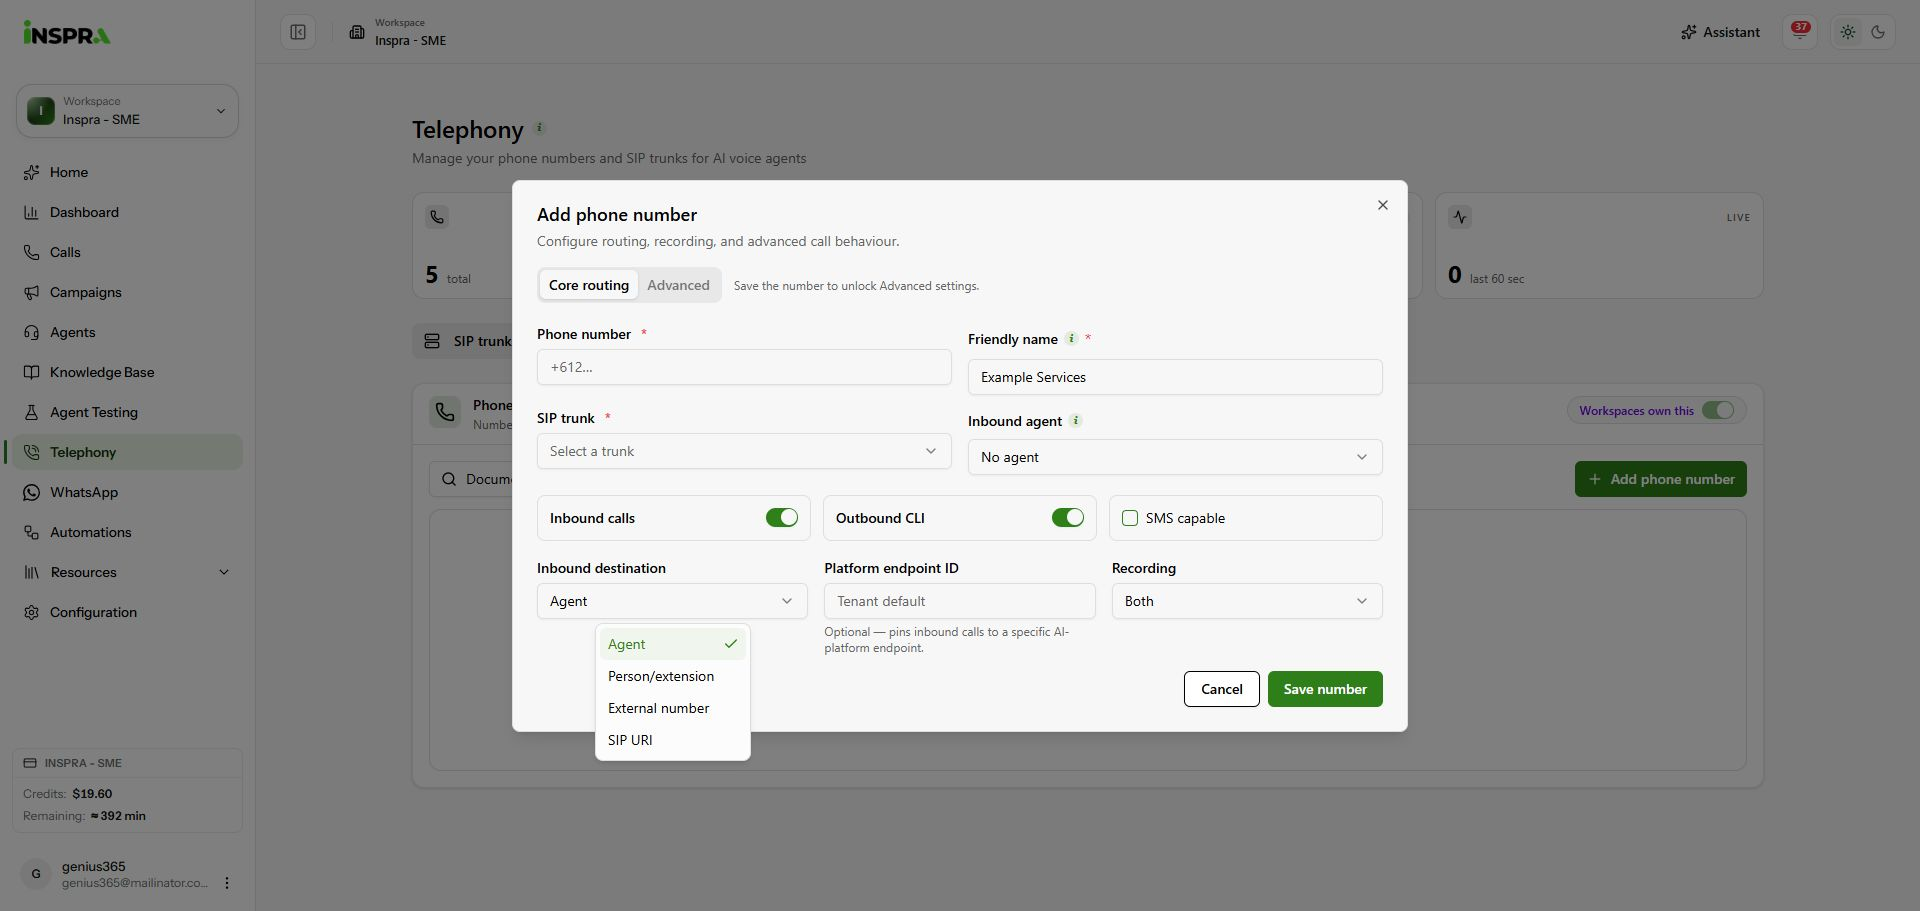
The available inbound destinations. 4. Review recording and save
Choose the Recording setting. For an external destination, enter Forward E.164 and choose whether the forwarded call shows the original caller or this DID. Click Save number. Confirm the number appears in the list. Reopen it to access Advanced, which is unavailable until the number is saved.
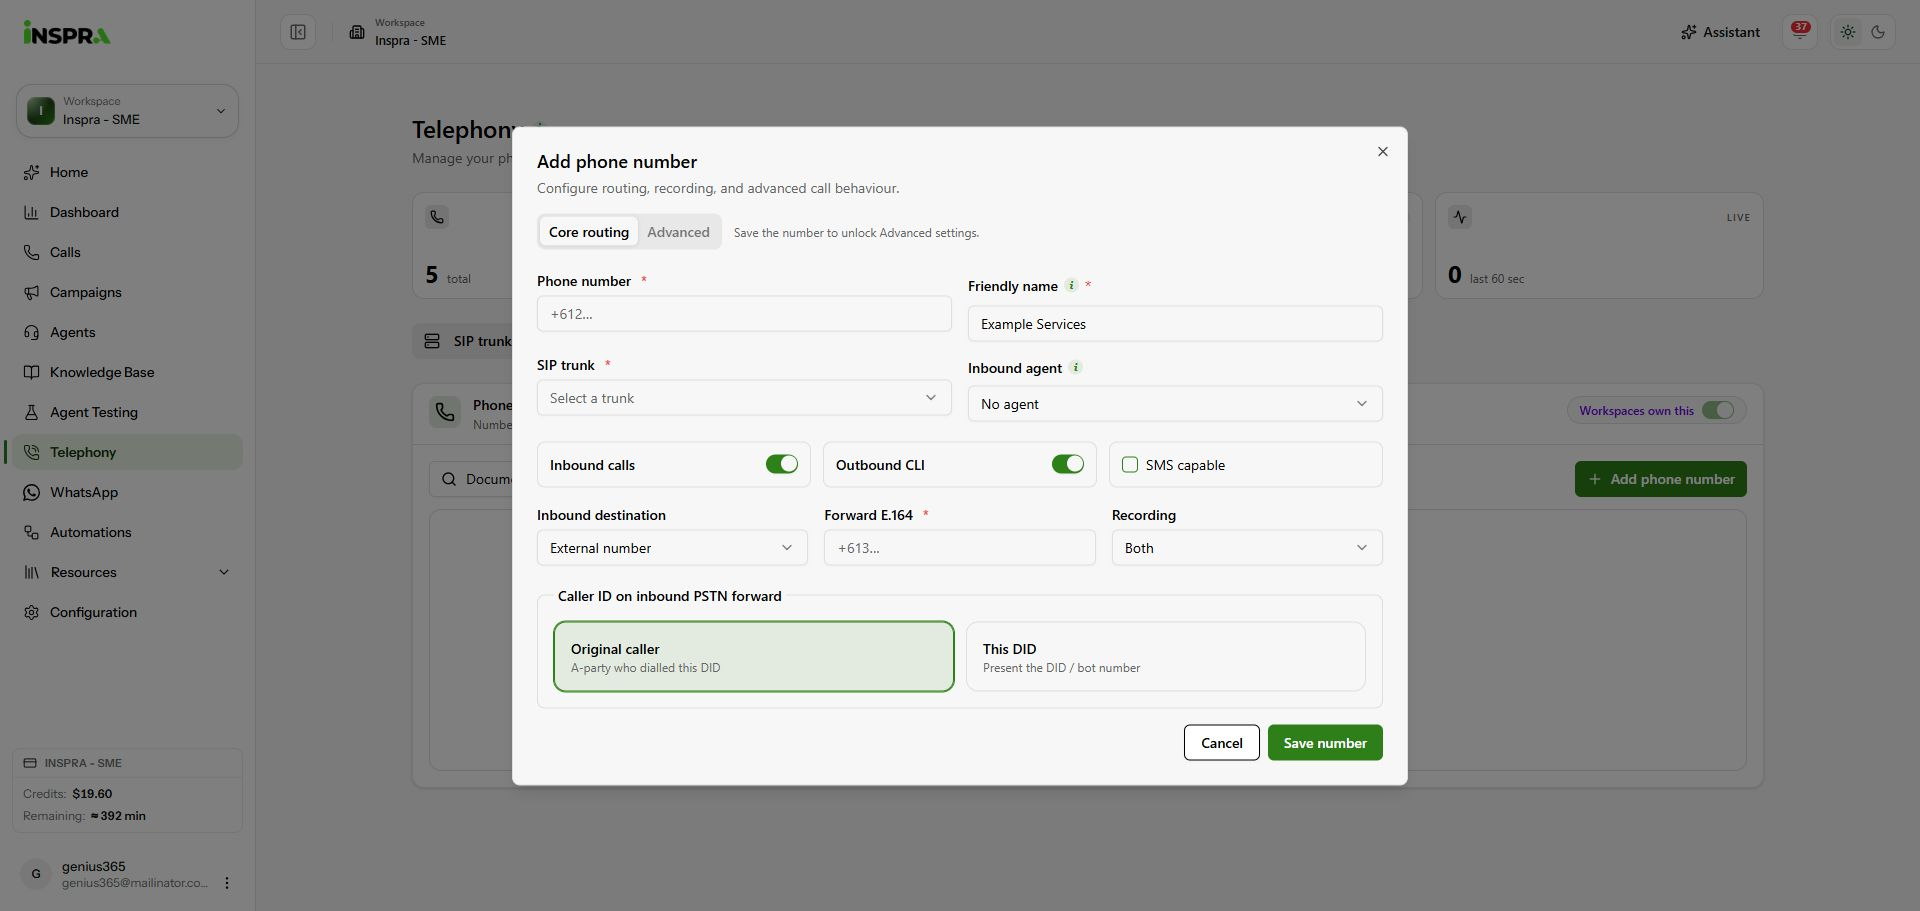
External forwarding fields, recording and Save number; the form remains unsaved.