

You need access to a workspace, permission to create agents and an available agent slot. This walkthrough uses an Inspra Agent named Alex Manual for Example Services.
1. Open Create Agent
Open Agents in the workspace sidebar, then click Create Agent below the agent list.
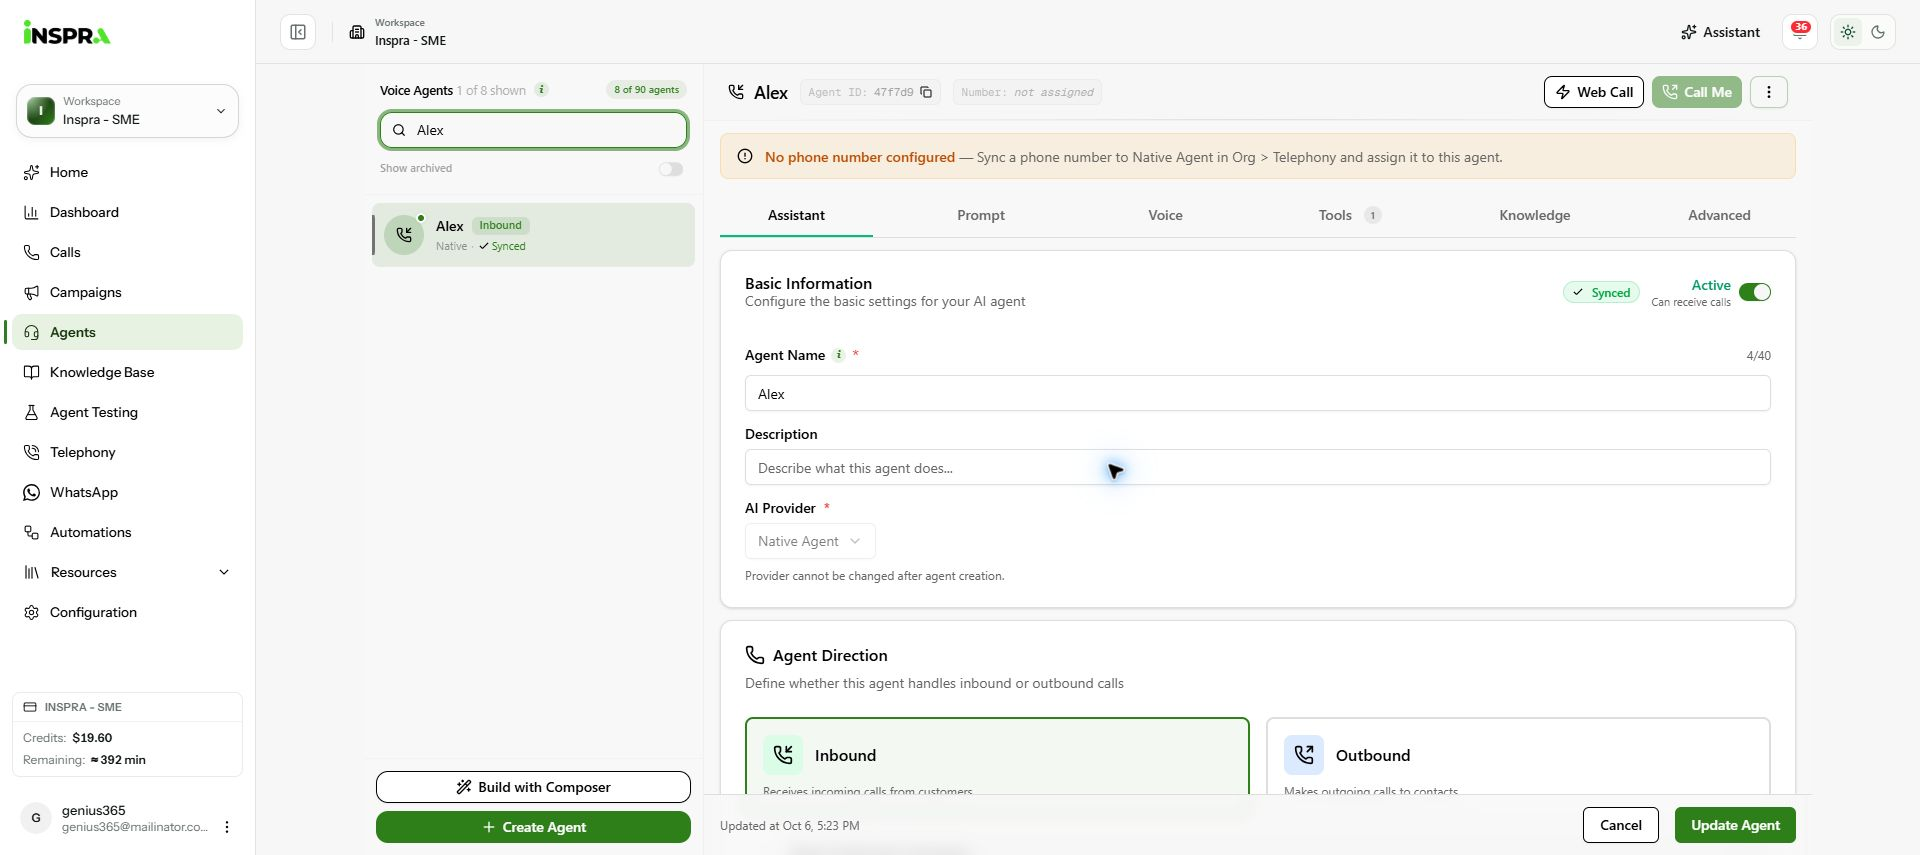
Open Agents and click Create Agent below the list. 2. Enter the name and choose a provider
In Setup & Voice, enter an Agent Name and a short Description. Select Inspra Agent, Vapi or Retell. This example uses Inspra Agent. Provider availability depends on your workspace integrations.
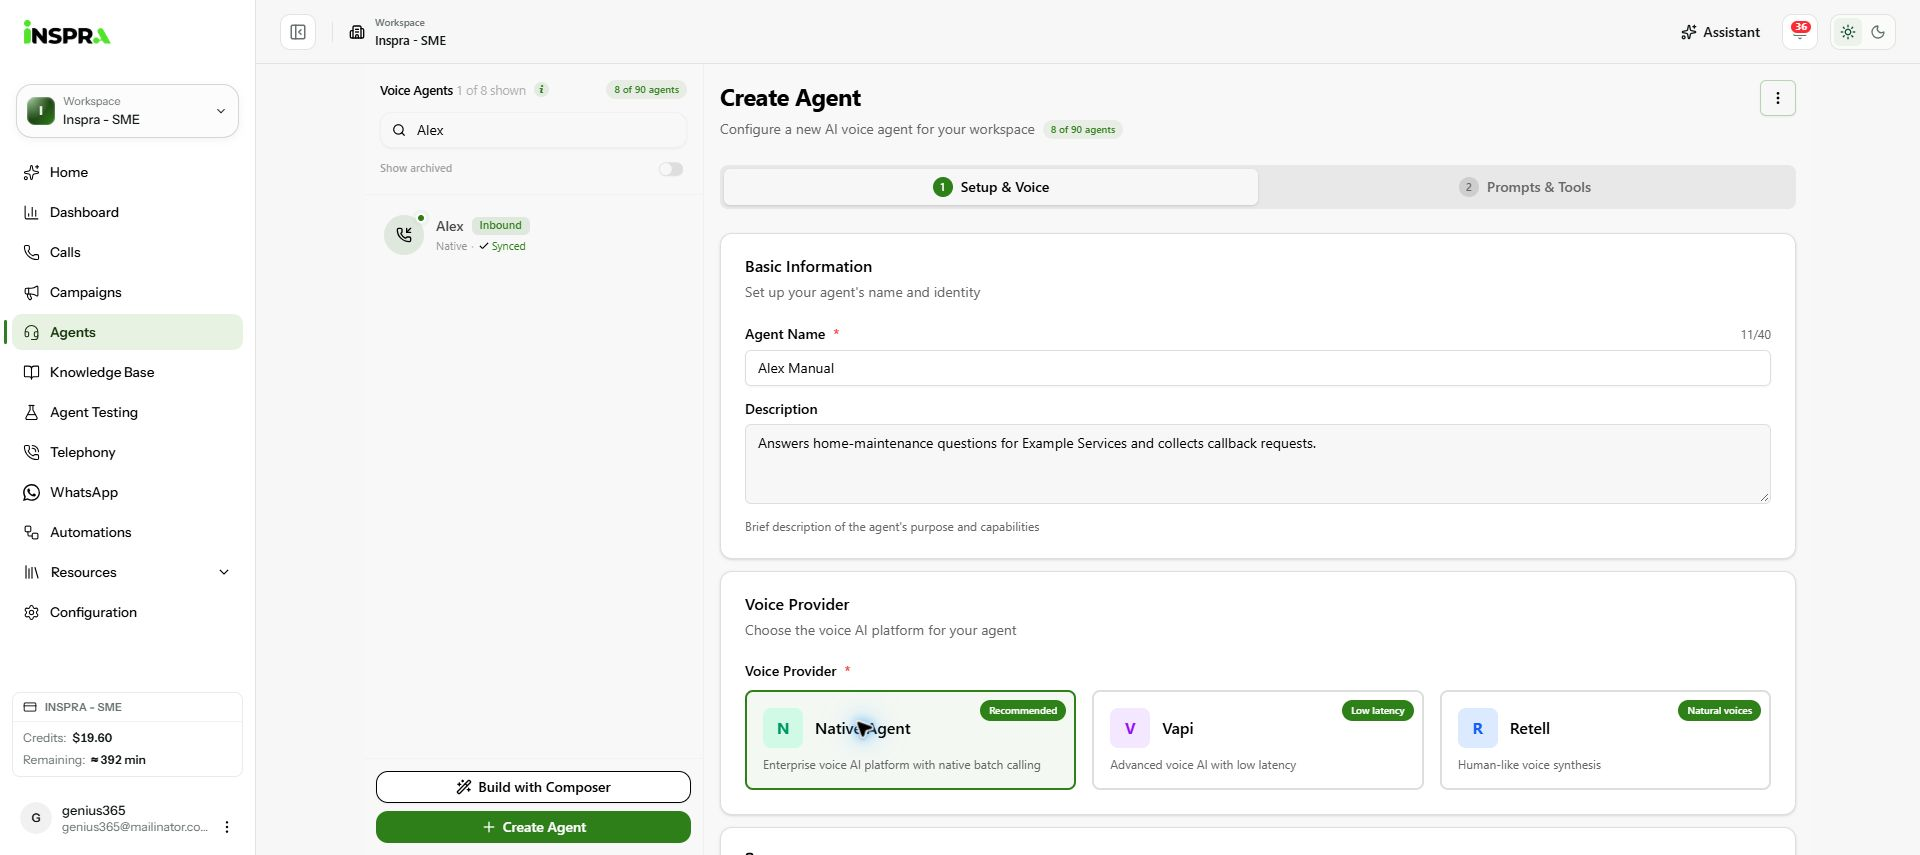
Agent name and description filled in, with Inspra Agent selected. 3. Set the direction and model
Choose Inbound to receive calls or Outbound to make calls. For an inbound agent, enable Allow Outbound Campaigns only if needed. Under LLM Model, choose a model provider and model; this example keeps OpenAI and GPT-4o Mini.
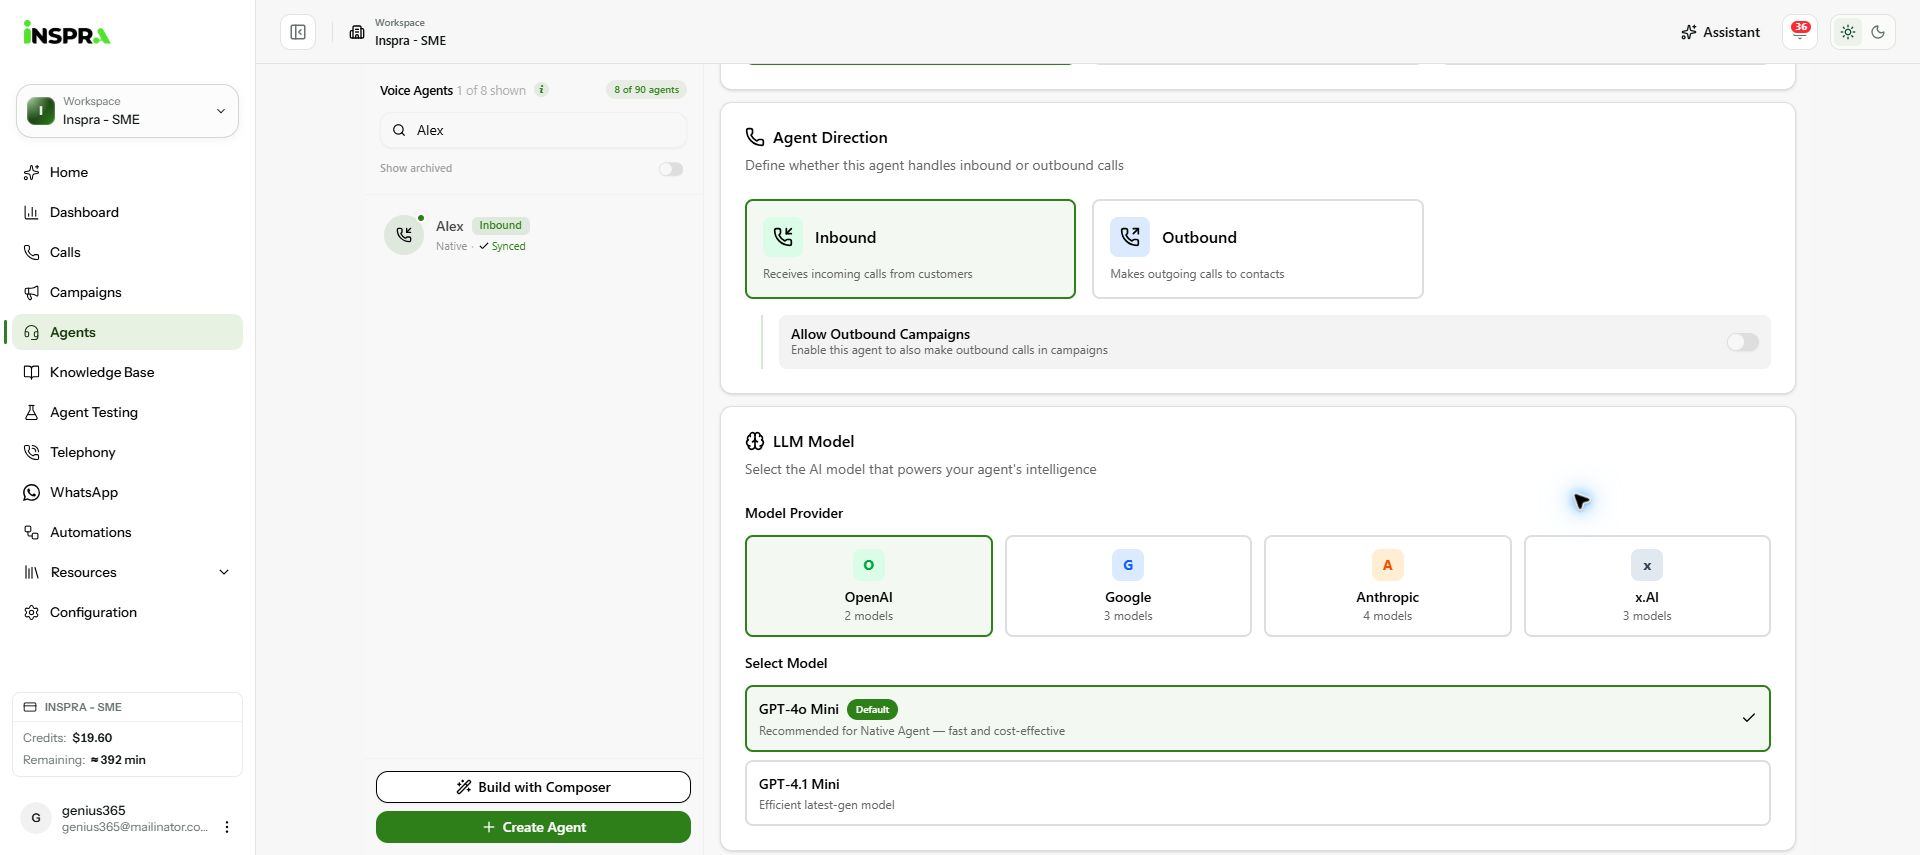
Inbound direction and the selected OpenAI GPT-4o Mini model. 4. Select a voice
Under Voice Configuration, click Choose voice. Search or filter the library, select a voice and click Use voice. Here, Callum is selected. Use the preview controls to listen when available.
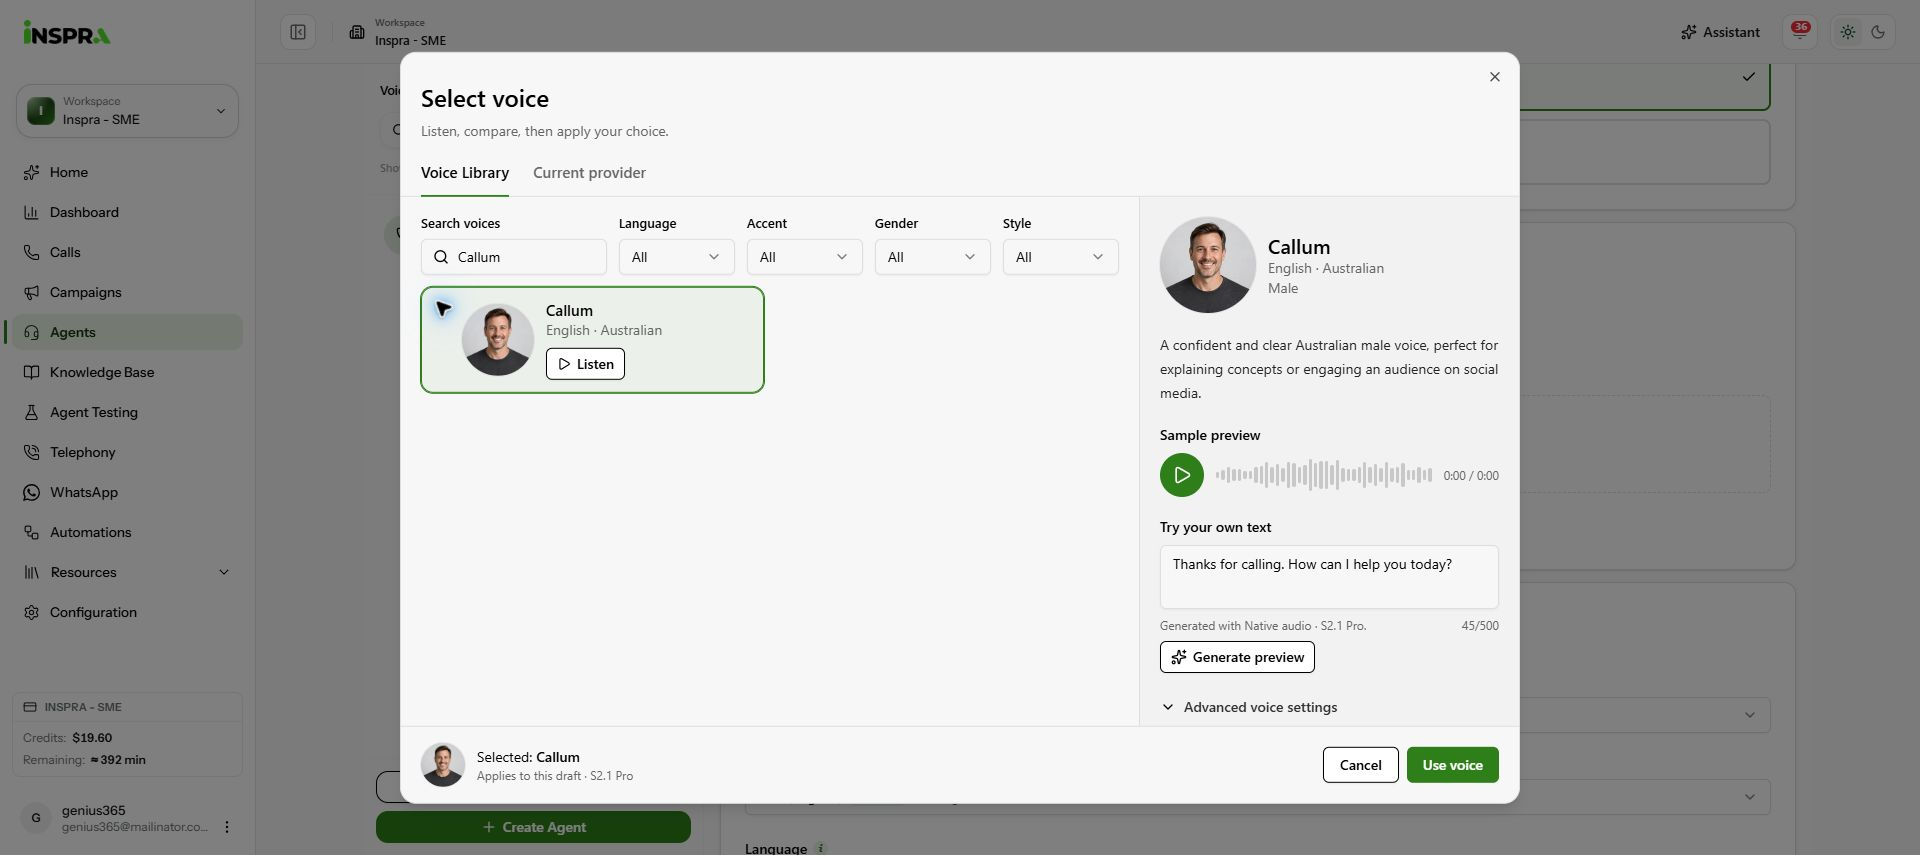
Callum selected in the voice picker; click Use voice to apply it. 5. Check transcription and continue
In Speech-to-Text, select the transcription provider, model and caller language. Add Key Terms only for names or specialist words that need recognition help. This example uses Deepgram, Flux (English) and English.
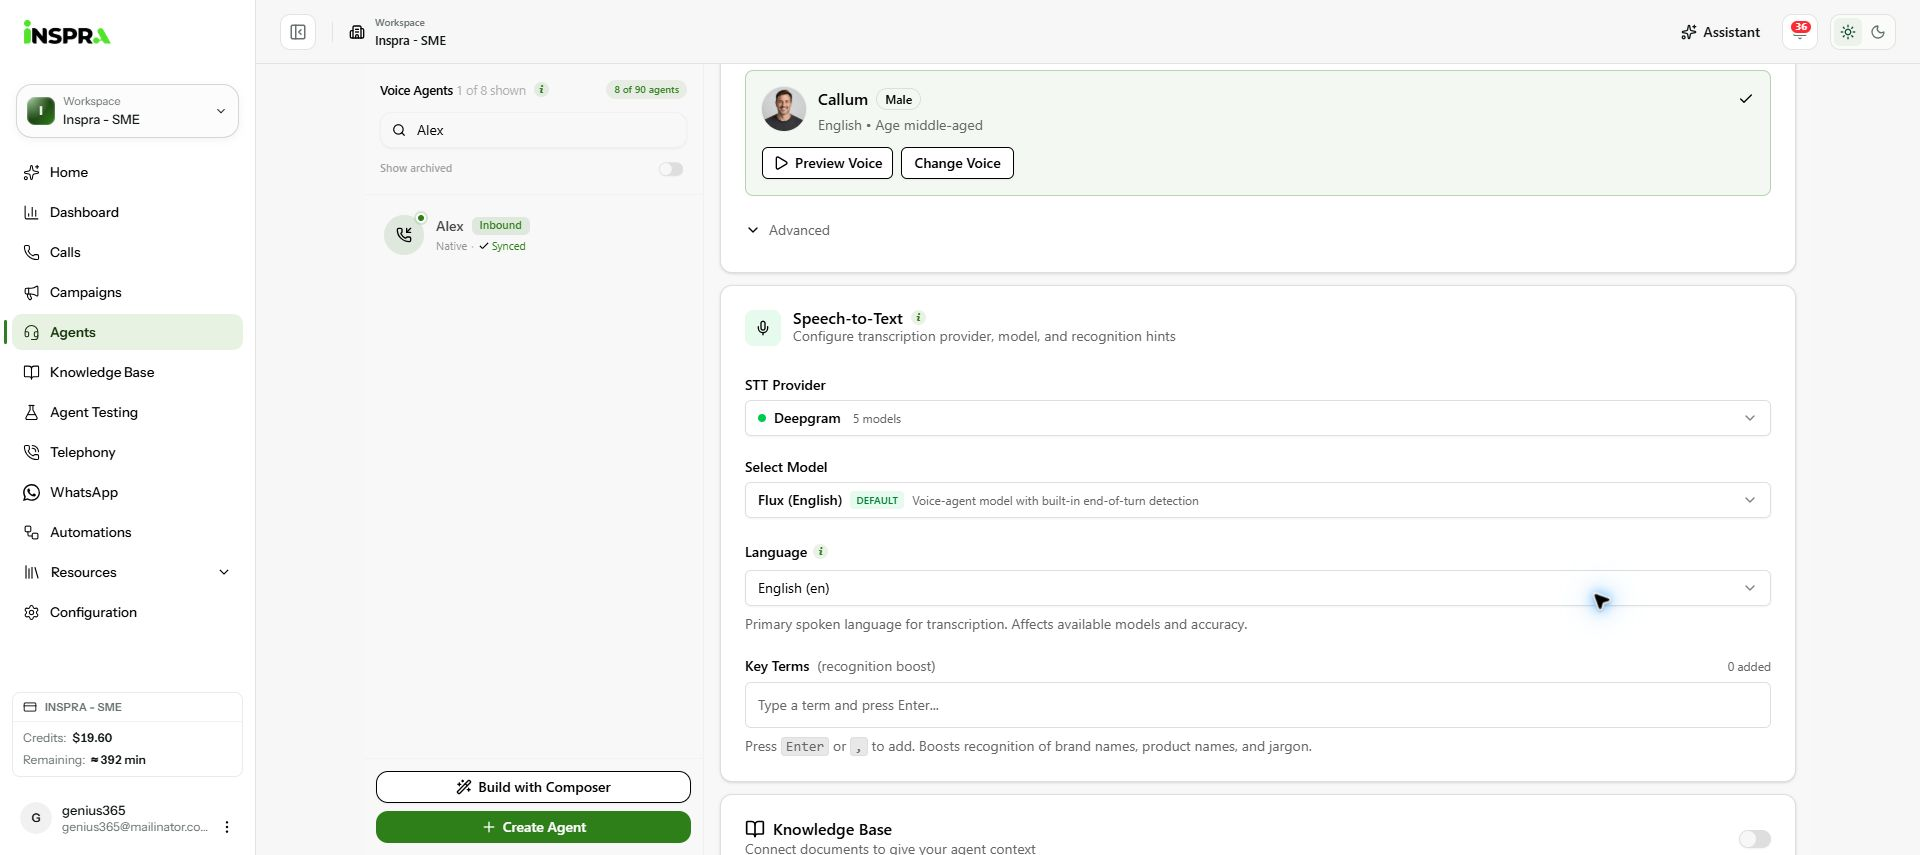
Selected voice and Speech-to-Text settings for English calls. Knowledge Base, Phone Number and Call Analysis Criteria are optional. Configure them only if needed; you can create the agent without a phone number or documents. Click Continue at the bottom of the form.
6. Write the greeting and instructions
In Prompts & Tools, choose who speaks first. With Agent First, fill in First Message and choose whether the caller can interrupt it. Enter a System Prompt describing the agent's role, call goal, information to collect and boundaries.
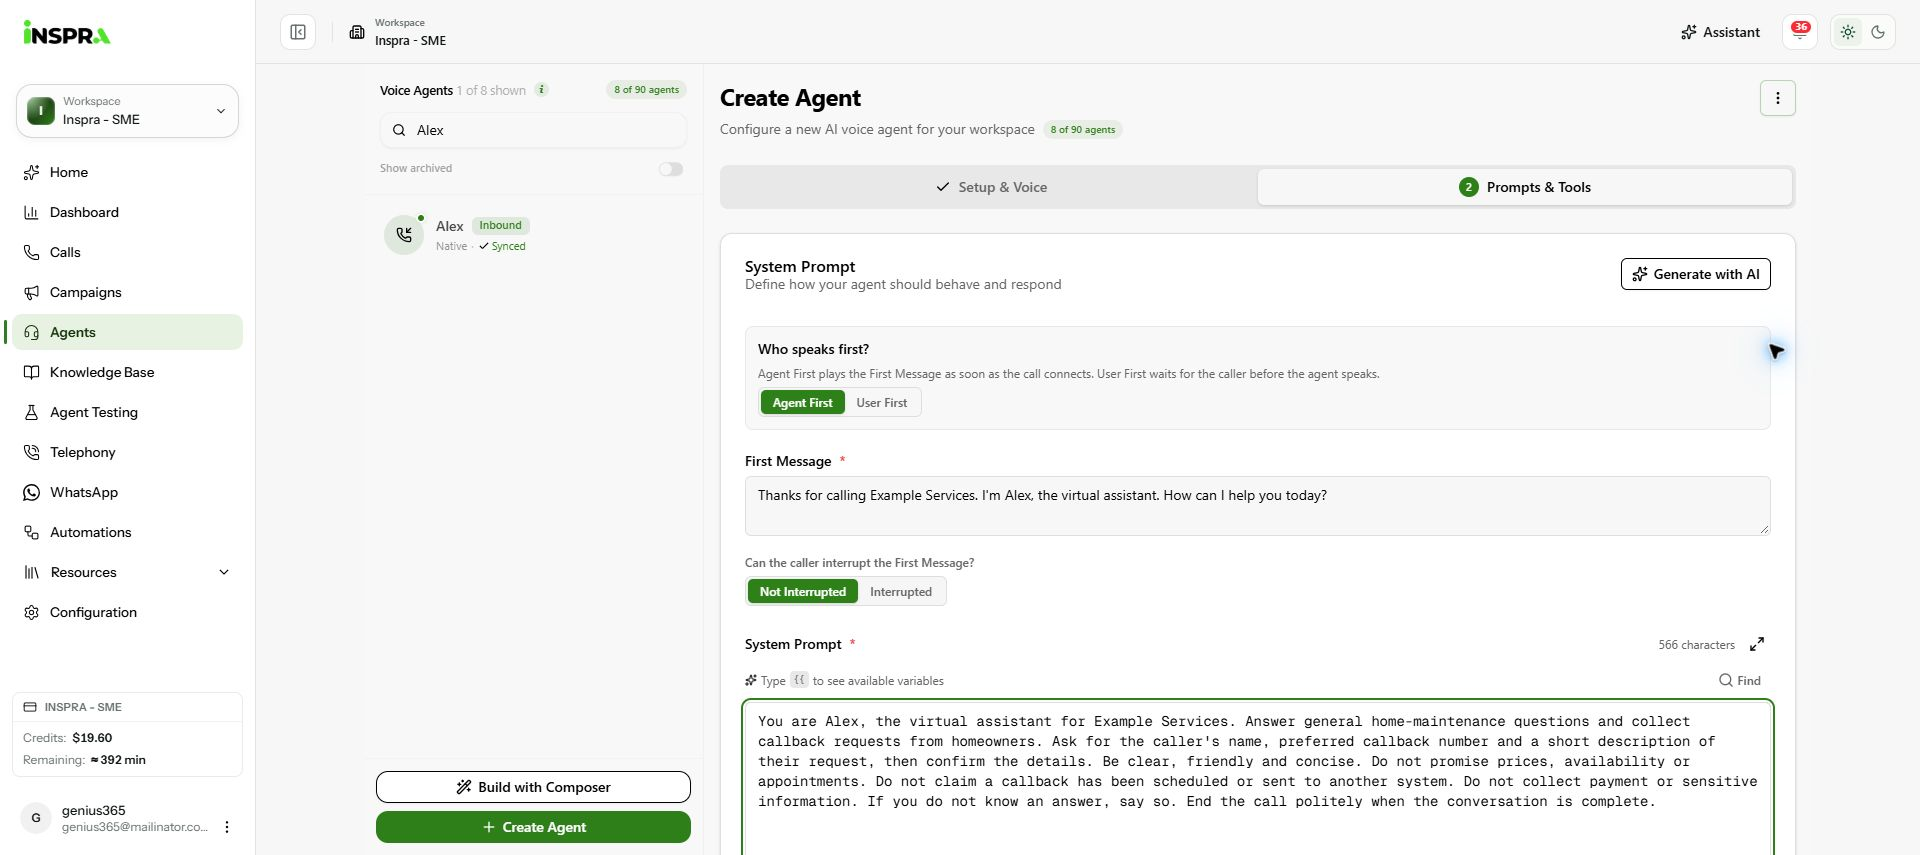
Agent First, the opening greeting and the completed system prompt. 7. Review optional tools
Keep End Call selected so the agent can finish a conversation. Add other Function Tools only if the agent needs them. The CRM / Webhook URL and Agent-Specific Variables are optional; leave them empty for this basic agent.
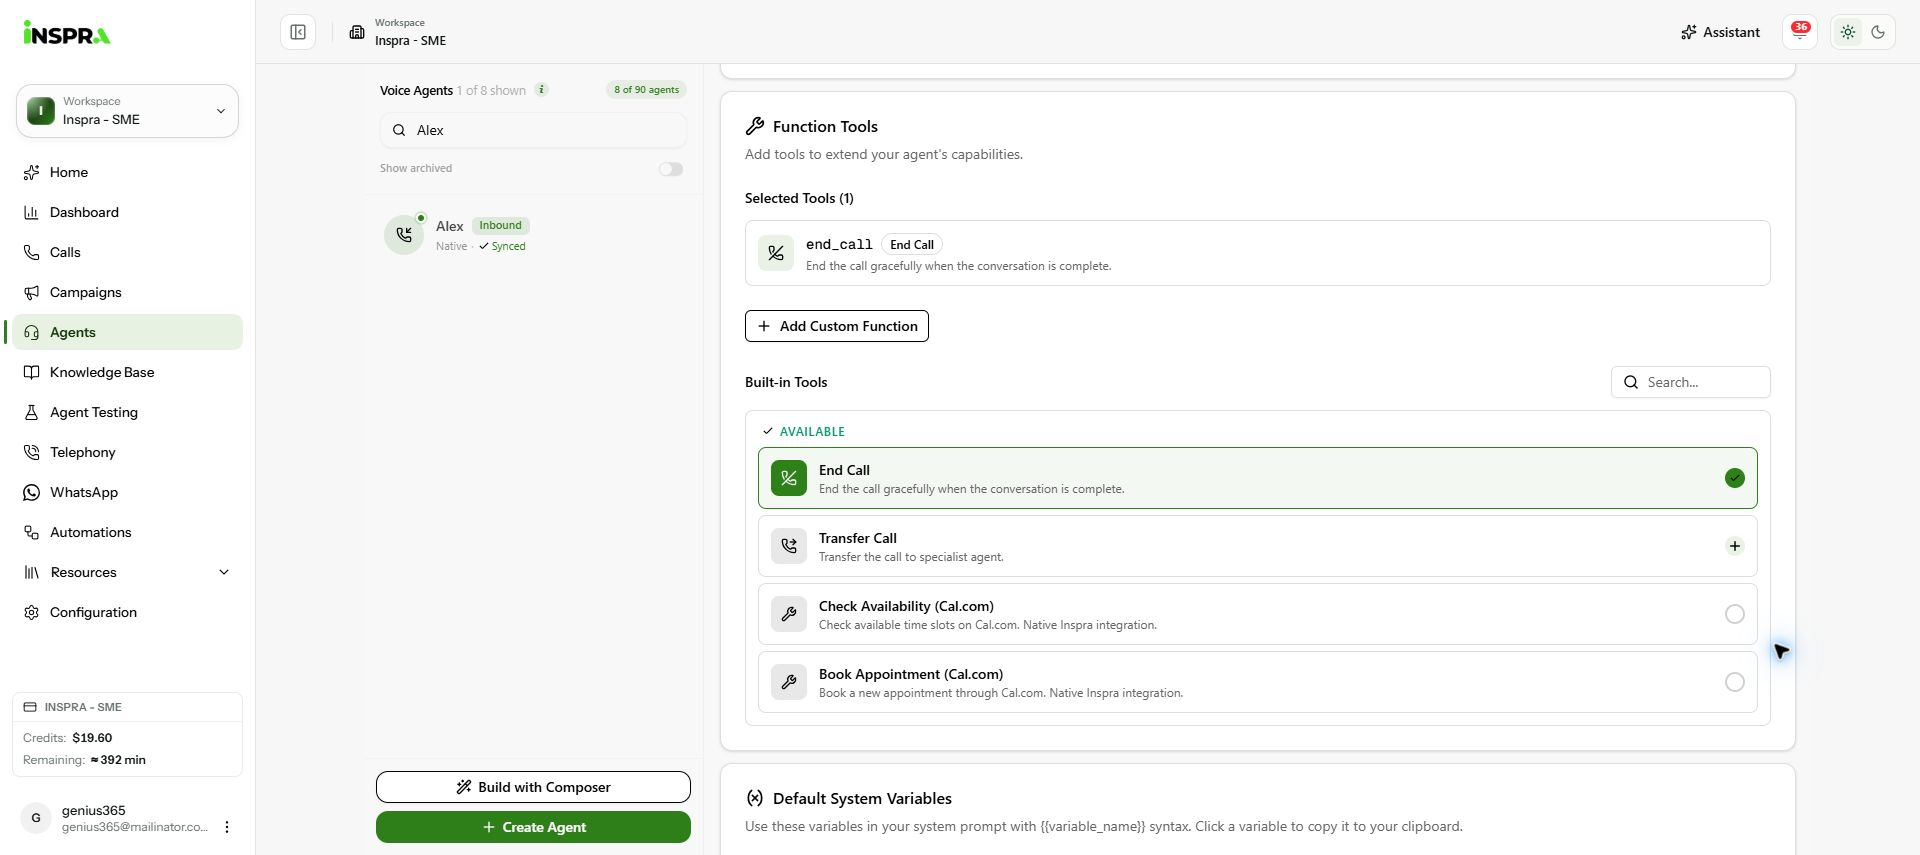
End Call selected; additional tools are optional. 8. Review and create
Check Review & Create. Use Back to correct setup choices, or click Create Agent to save.
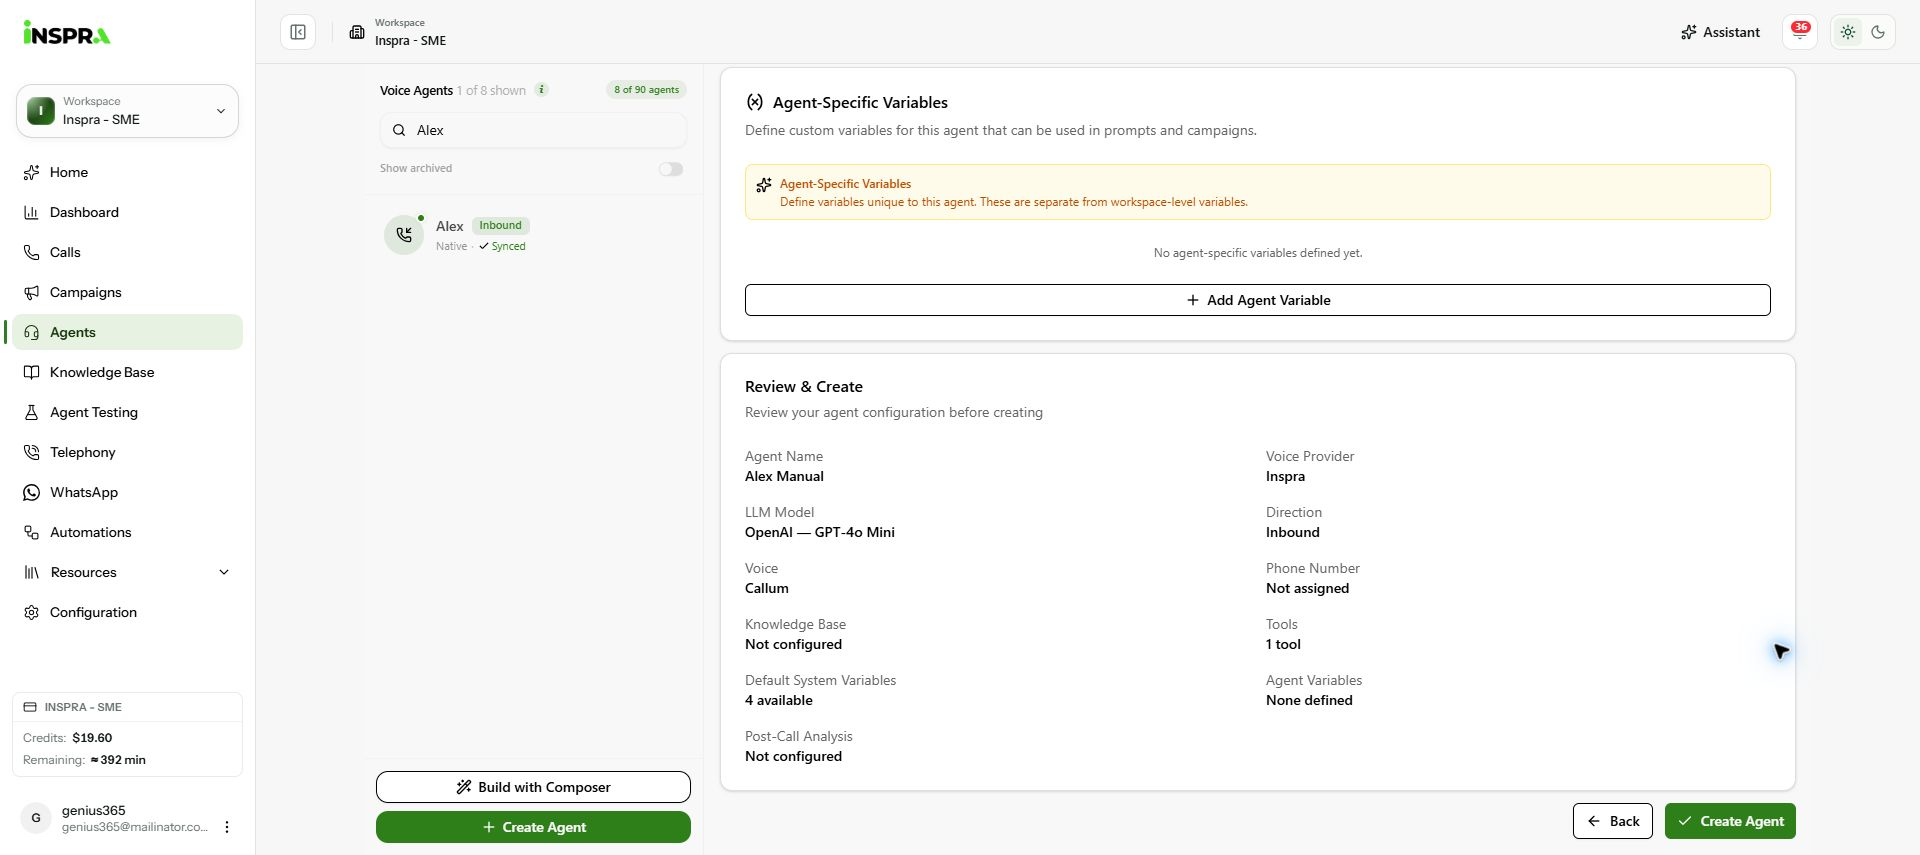
Review the configuration, then click Create Agent. The new agent opens in its editor. Confirm that its name appears in the list and provider sync completes.
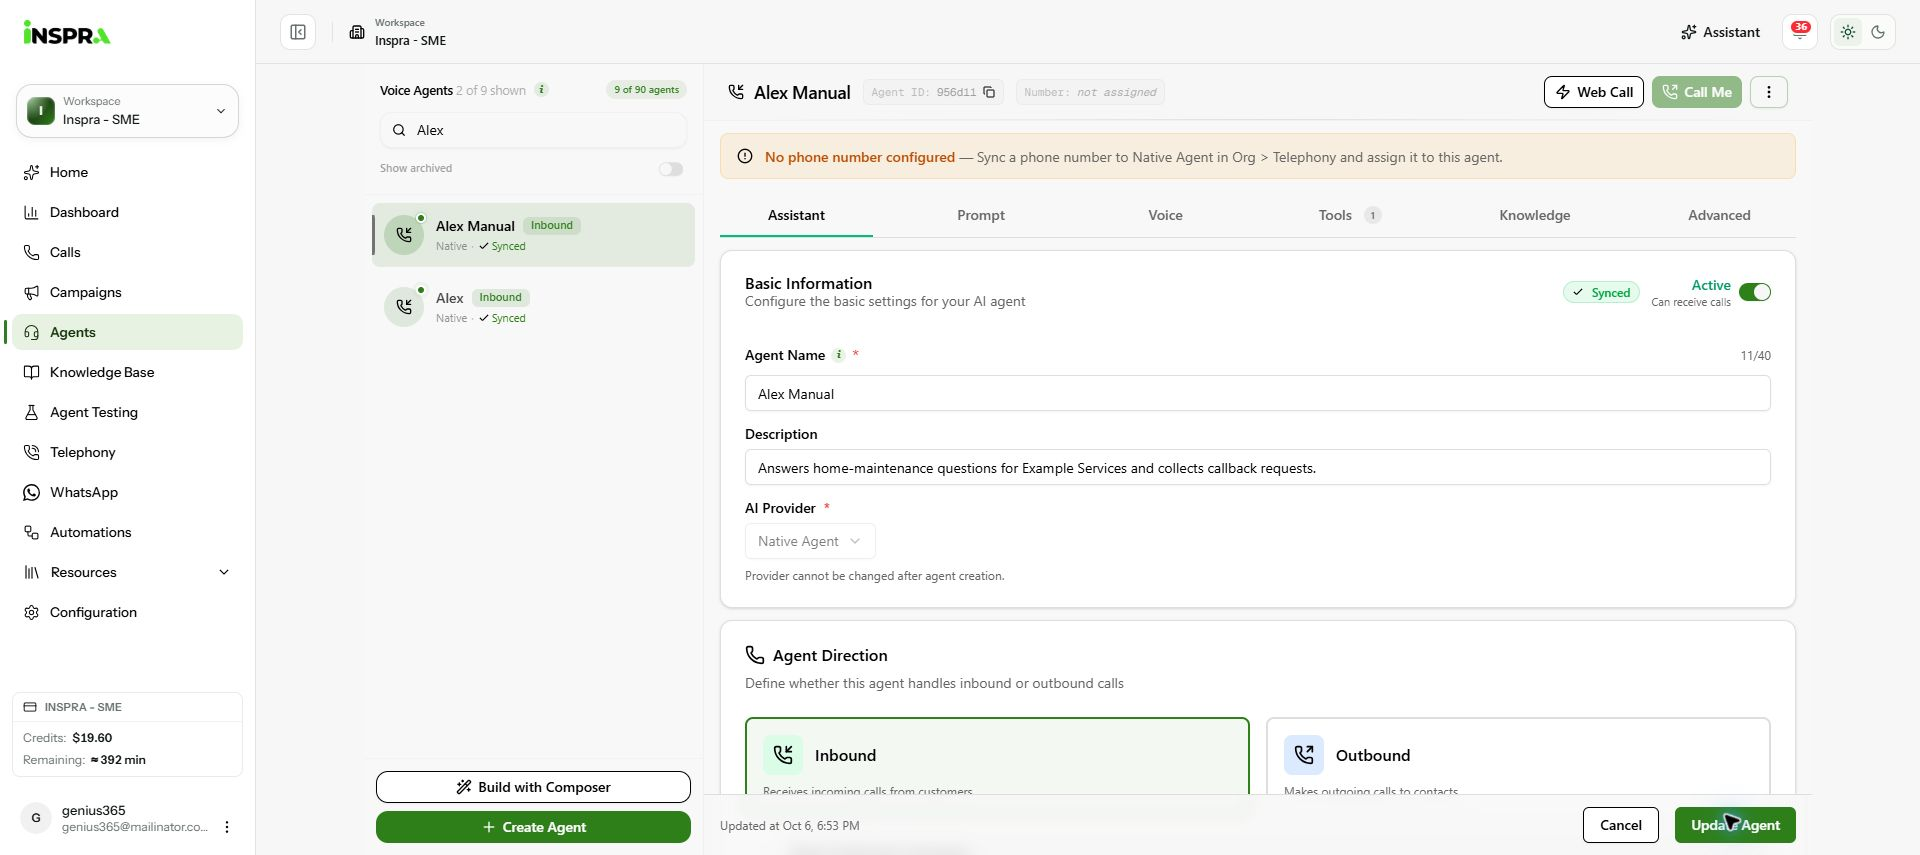
Alex Manual created successfully and marked Synced.