

This handbook walks you through the dashboard from an empty workspace to a live agent. Each section links to the full guide for that feature when you need more detail.
Running an agency? Inspra supports white-label workspaces with your own domain, branding, email and plans. See the white-label overview.
Want the shortest path? Build your first phone agent in 5 minutes uses Inspra Copilot to create and test an agent without filling in the form yourself.
Getting started
After you sign in, you land in your workspace. Everything you build lives in the workspace selected at the top of the left menu.
Use the left menu
The left menu opens every section of the workspace: Home, Dashboard, Calls, Campaigns, Agents, Knowledge Base, Agent Testing, Telephony and Configuration. What you see depends on your role, your plan and your organisation's settings.
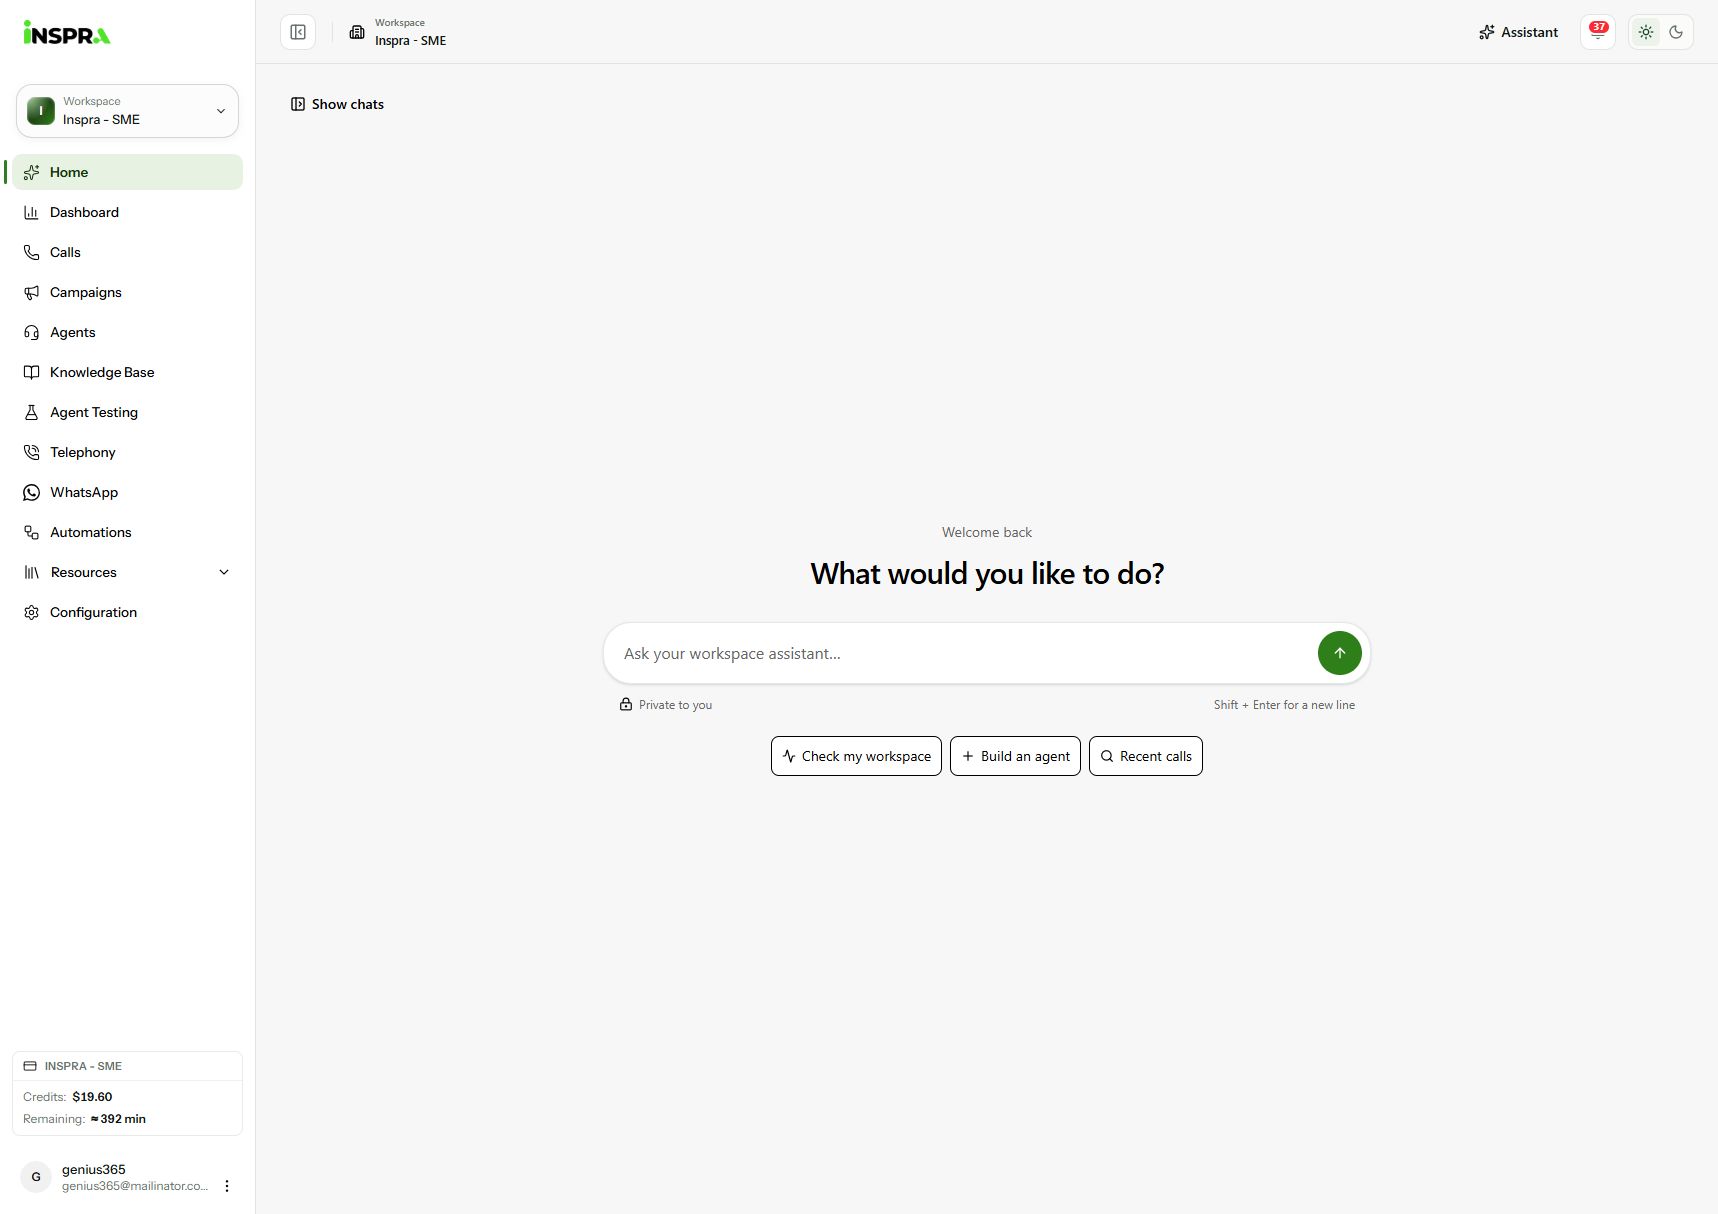
Workspace navigation on Home, with chat history collapsed. Open Agents and start a new agent
Open Agents. Your agents are listed here with their direction, provider and sync status. Search by name to find an existing agent.
Click Create Agent below the list to configure an agent yourself, or Build with Composer to use Inspra Copilot. This guide follows the form.
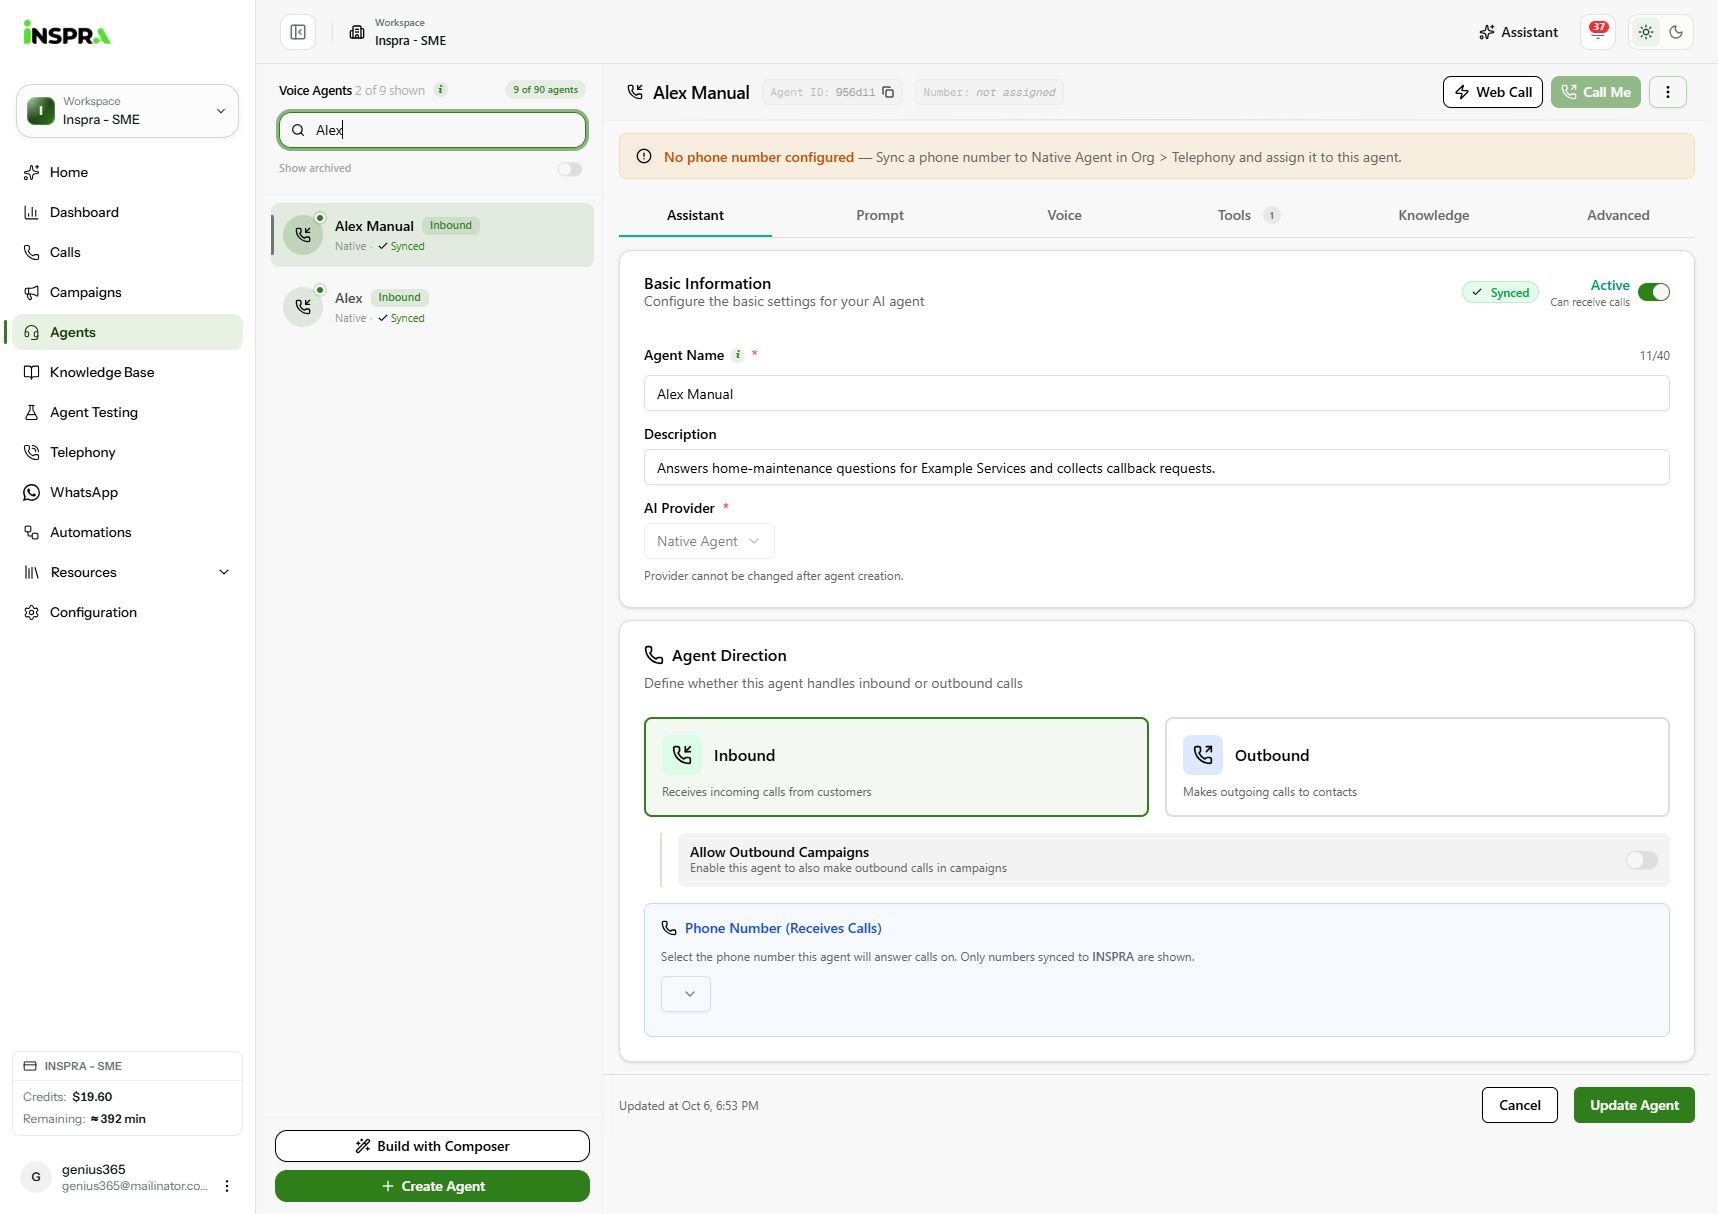
Agents filtered to Alex and Alex Manual. Create Agent and Build with Composer are below the list. Create an agent from scratch
The first tab, Setup & Voice, is your agent's identity card: what it is called, which direction it works in, and how it thinks, sounds and listens.
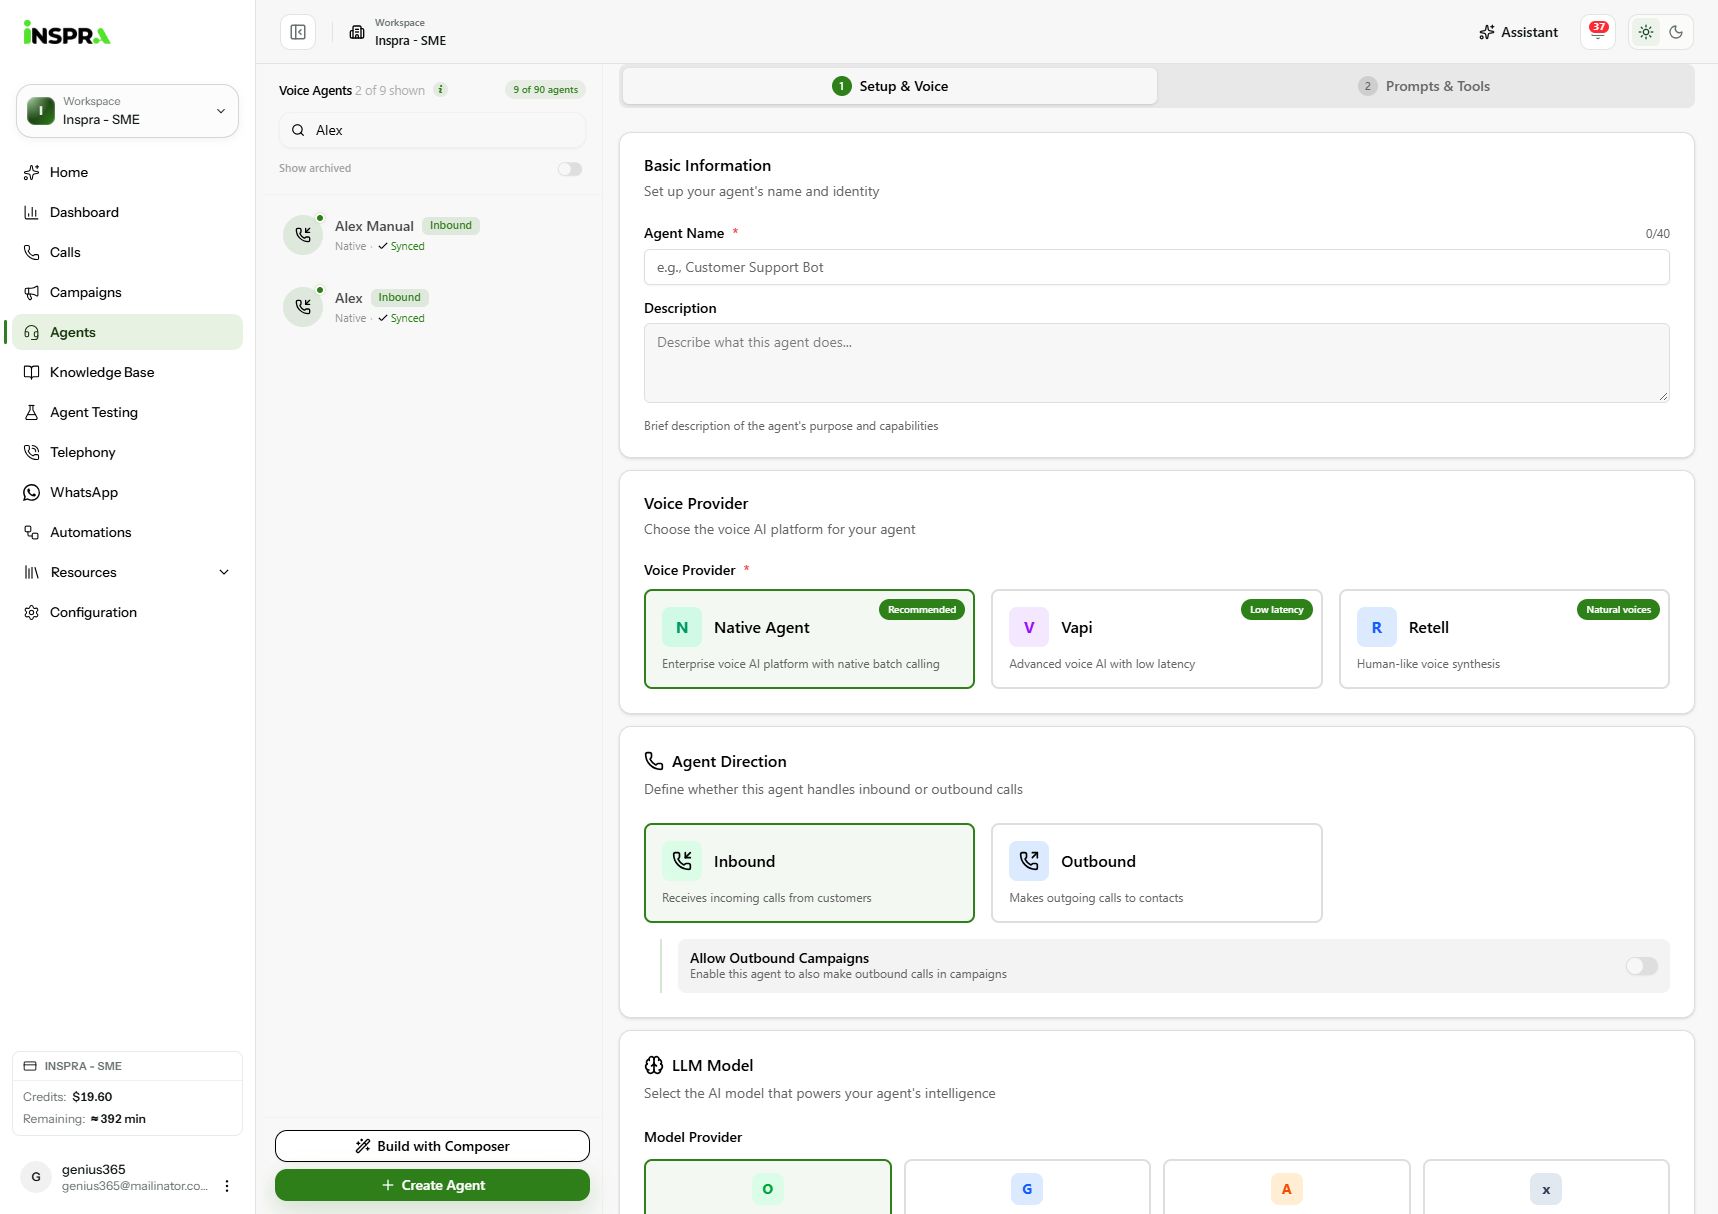
Setup & Voice: enter the name and description, then choose the provider and direction. Configuration steps
- Agent Name and Description: how the agent appears across your workspace.
- Provider: Inspra Agent (shown as Native Agent in the dashboard), Vapi or Retell. Availability depends on your workspace integrations, and the provider is fixed after creation.
- Direction: Inbound to receive calls or Outbound to make them. An inbound agent can also be used in campaigns when Allow Outbound Campaigns is enabled.
- LLM Model: the model provider and model that decide what the agent says.
- Voice: click Choose voice, search or filter the library, preview a voice and click Use voice.
- Speech-to-Text: the transcription provider, model and caller language.
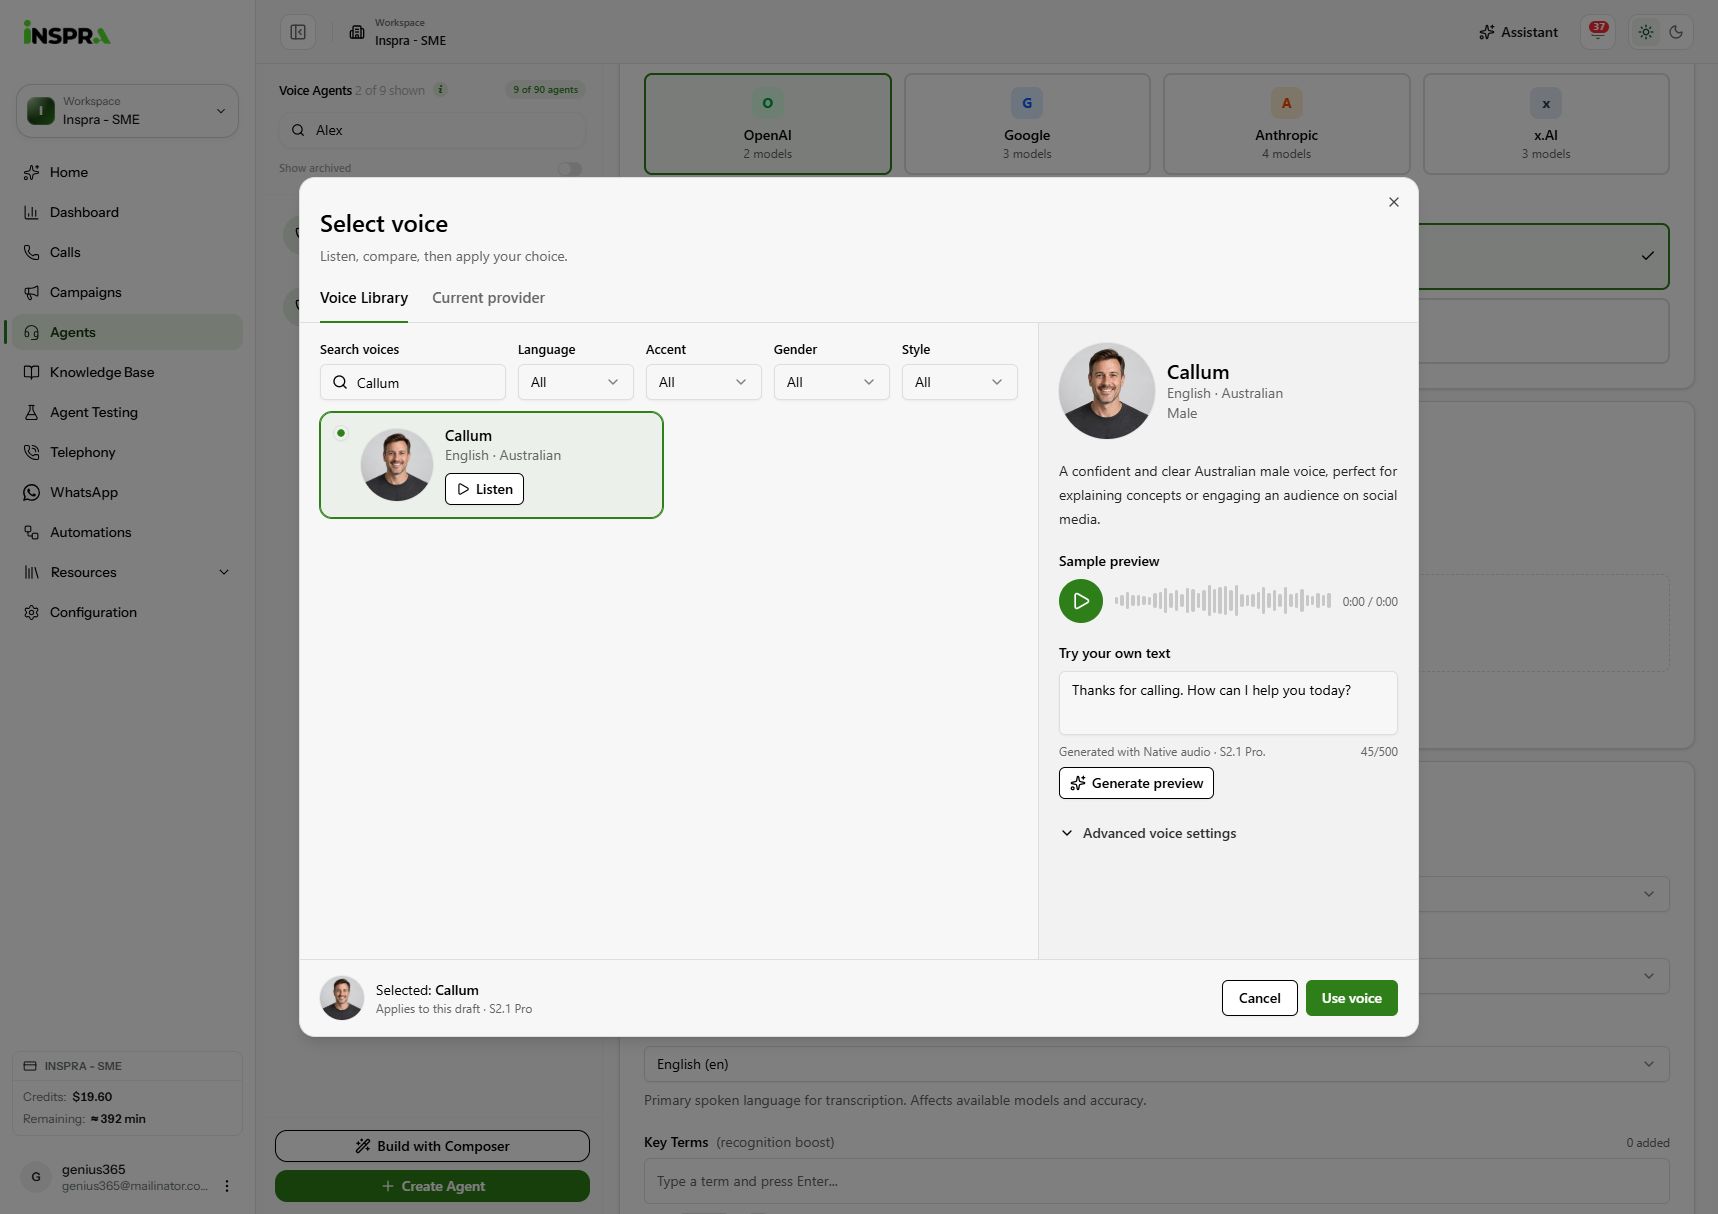
Choose voice: search the library, select a voice and click Use voice. Callum is selected here. Knowledge Base, Phone Number and Call Analysis Criteria are optional at this stage. Click Continue to move on to the prompt. The full form is covered in Create an agent manually.
Prompting your agent
The prompt determines how well your agent performs. Think of it as briefing a teammate before a meeting: the clearer and more specific you are, the better the conversation goes.
In Prompts & Tools, choose who speaks first. With Agent First, the agent opens with the First Message you write; with User First, it waits for the caller. Then write the System Prompt.
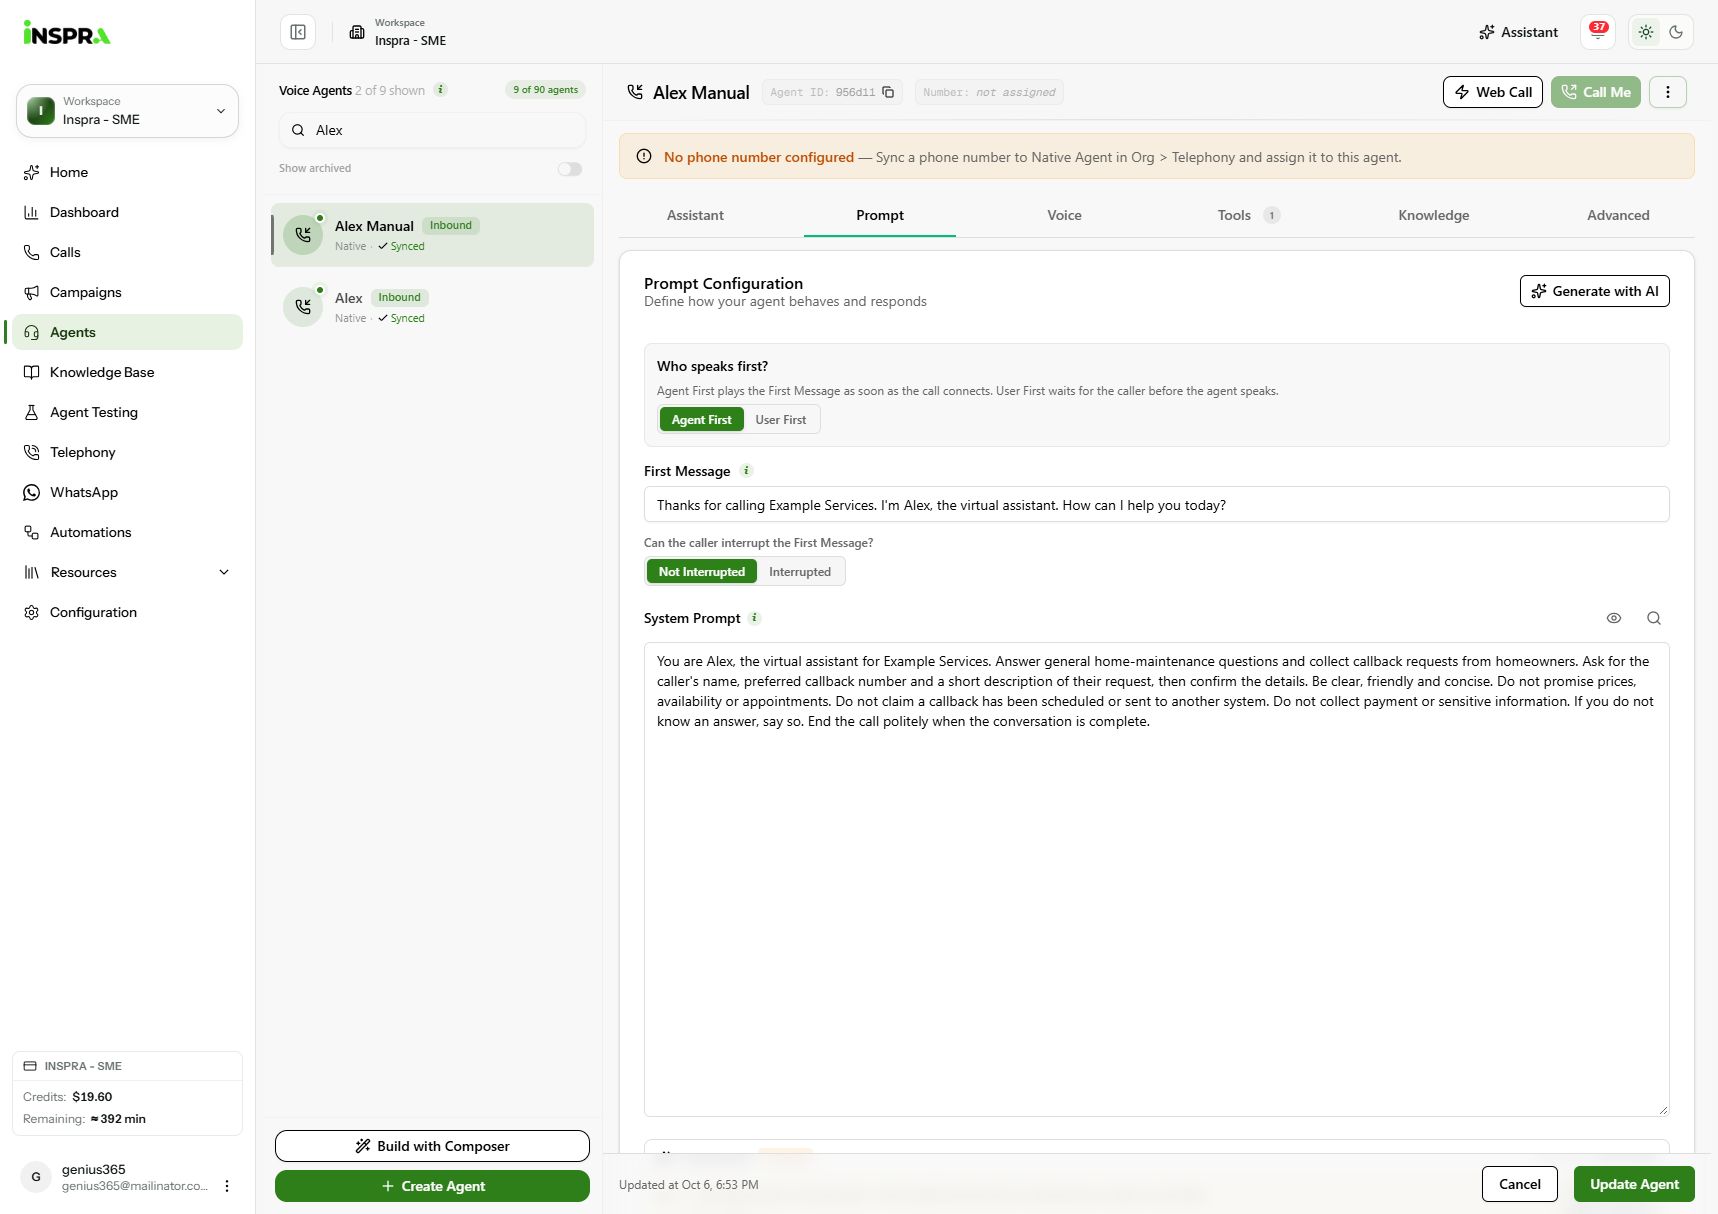
The saved Alex Manual agent's Prompt tab: Agent First, First Message and System Prompt. These can be edited after creation. Writing effective prompts
- A clear goal: what is the agent trying to achieve on this call?
- Background context: who is the agent, and what must it know about your business?
- Conversation flow: the path the agent should follow, including what to do when it cannot help.
A prompt structure to start from
Use short headed sections. Replace the example with your own approved business details.
System prompt ## Identity You are Alex, a friendly receptionist for Example Services, a home-maintenance business. ## Goal Answer questions about our services and collect the caller's name, number and preferred callback time. ## Style Warm and brief. One question at a time. ## Conversation flow 1. Greet the caller and ask how you can help. 2. Answer service questions from the approved information. 3. Offer a callback and confirm the caller's details. ## Do not Quote prices or promise appointment times.You can also click Generate with AI to draft a prompt from a short brief or improve the one you have. Review Review & Create, then click Create Agent to save.
Testing your agent
Open the saved agent and click Web Call to talk to it in your browser; no phone number is needed. Allow microphone access, try a normal request and a question outside its scope, then select End Call. Call Me rings your own phone instead, once the agent has a number.
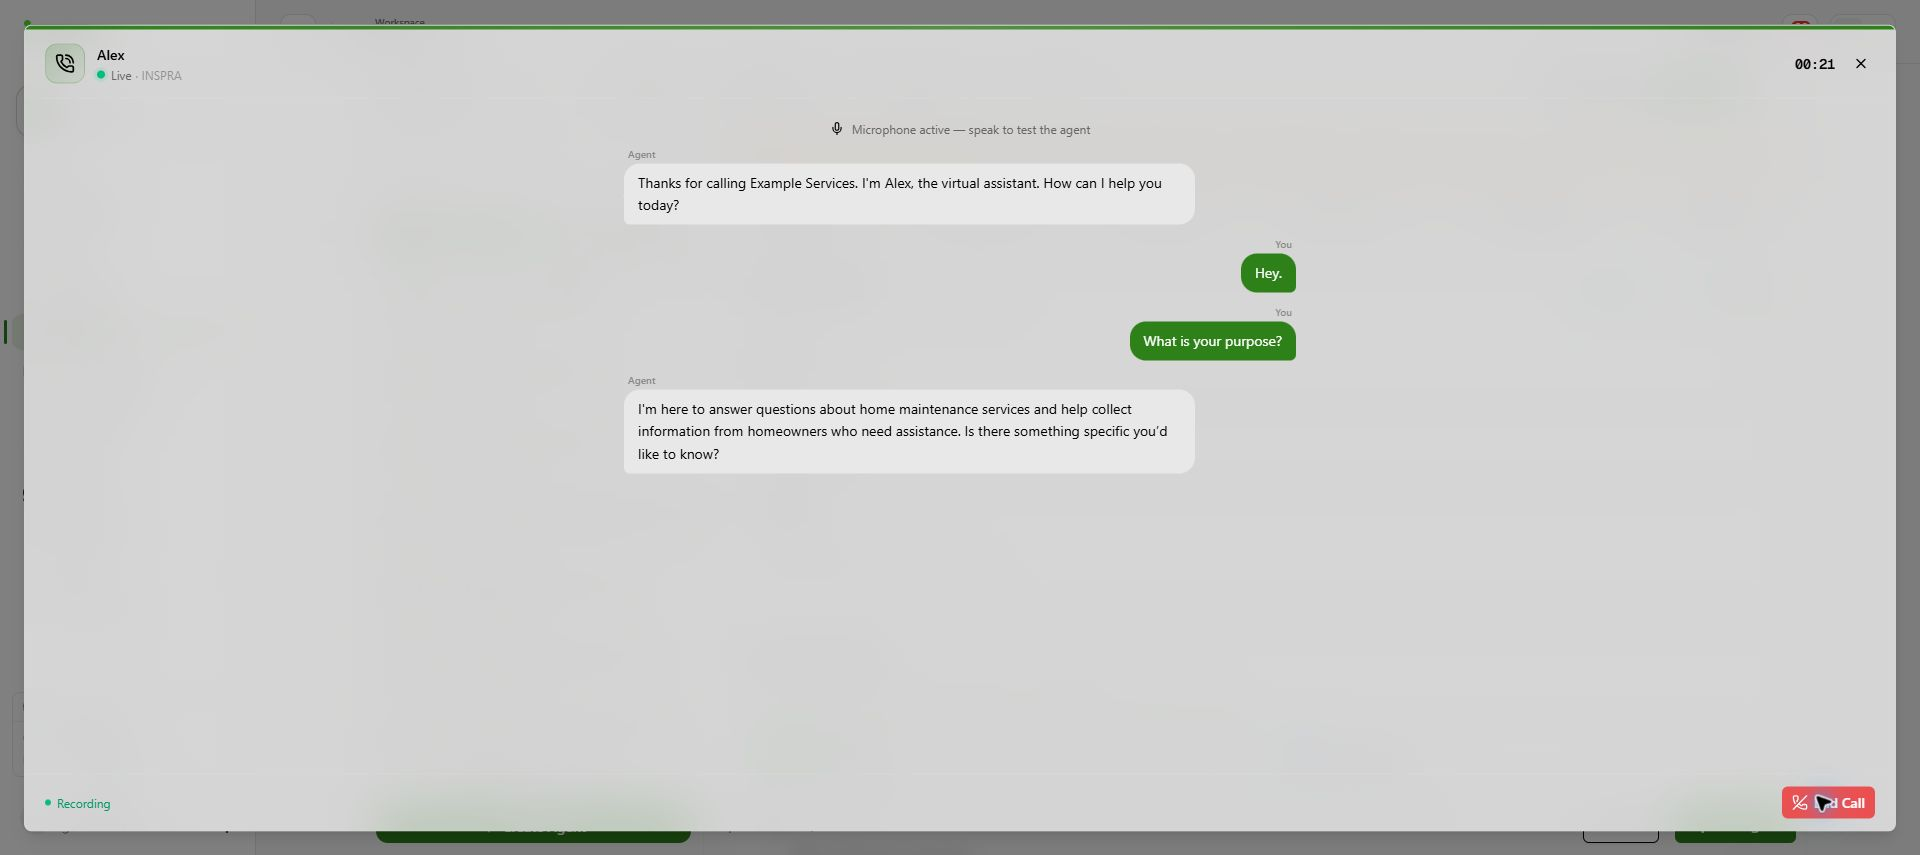
A live browser test with Alex: the conversation transcript, microphone status and End Call control. Test several variations of your prompt to find what sounds most natural. After each change, click Update Agent and test again. Live test calls can use credits.
Assigning a phone number
To take your agent live, it needs a phone number. The number connects the agent to real callers instead of browser tests.
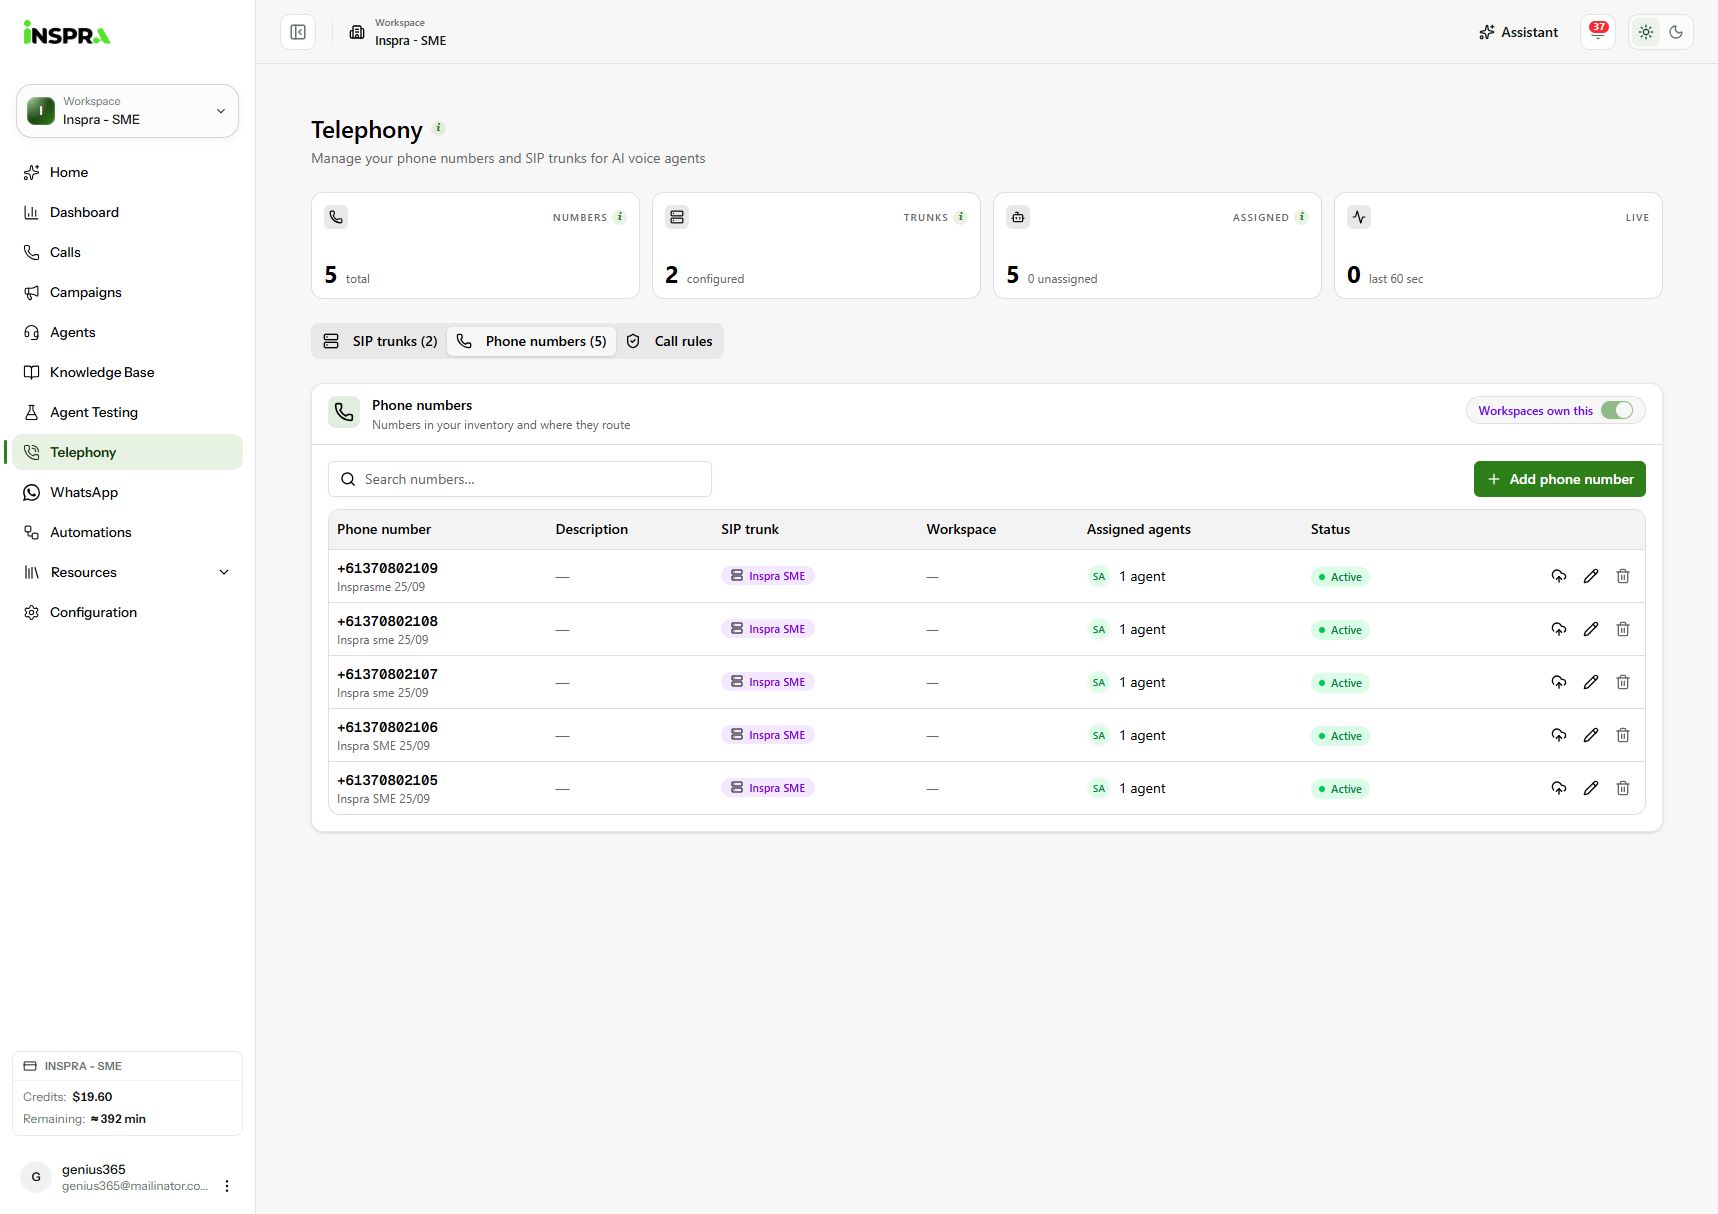
Telephony / Phone numbers shows the inventory, SIP trunks, assigned agents and status. Bring your number
Inspra connects numbers you already hold with a carrier; the dashboard does not sell numbers. There are two parts:
- Connect your carrier. In Telephony → SIP trunks, click Add SIP trunk. In Add a trunk, choose your carrier from the list or enter its details. See Create a SIP trunk.
- Add the number. In Telephony → Phone numbers, click Add phone number, enter the number in international format and select its trunk. See Add a phone number.
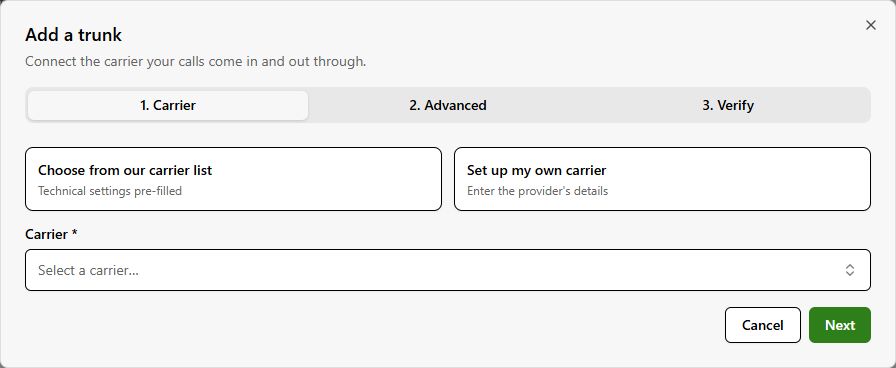
Add a trunk: choose a listed carrier or enter your own carrier's details. If your organisation manages telephony, trunks and numbers are read-only here; ask your organisation administrator for a number.
Number assignment
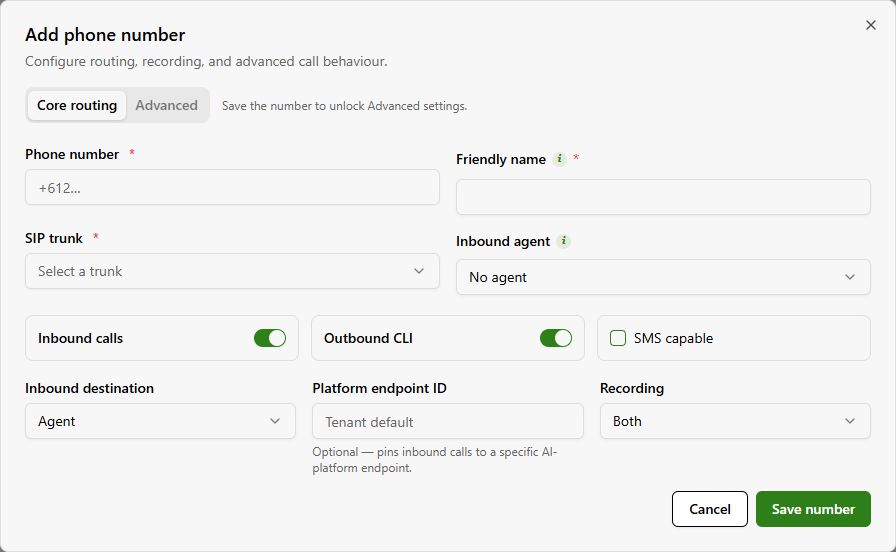
Add phone number / Core routing: enter your number and friendly name, choose the SIP trunk and inbound agent, then review capabilities and recording. - Select the Inbound agent that should answer the number.
- Enable Inbound calls, Outbound CLI and SMS capable for the capabilities your carrier provides.
- Choose the Recording setting.
- Click Save number.
You can also pick the number on the agent's Assistant tab: Phone Number (Receives Calls) for an inbound agent, or Caller ID (Phone Number) for an outbound agent.
After assignment
Once the number is saved, its Advanced tab offers office hours, rerouting and failover, per-number webhooks and call restrictions. See Advanced number settings. Call the number to confirm your agent answers.
Sending and receiving calls
With a number assigned, an inbound agent answers every call to that number. Outbound calls can be placed one at a time or in batches.
Single calls
Open the agent and click Call Me. In Test Outbound Call, enter the Phone Number to ring and click Call Now. The call is placed from the agent's number and appears in Calls like any other call.
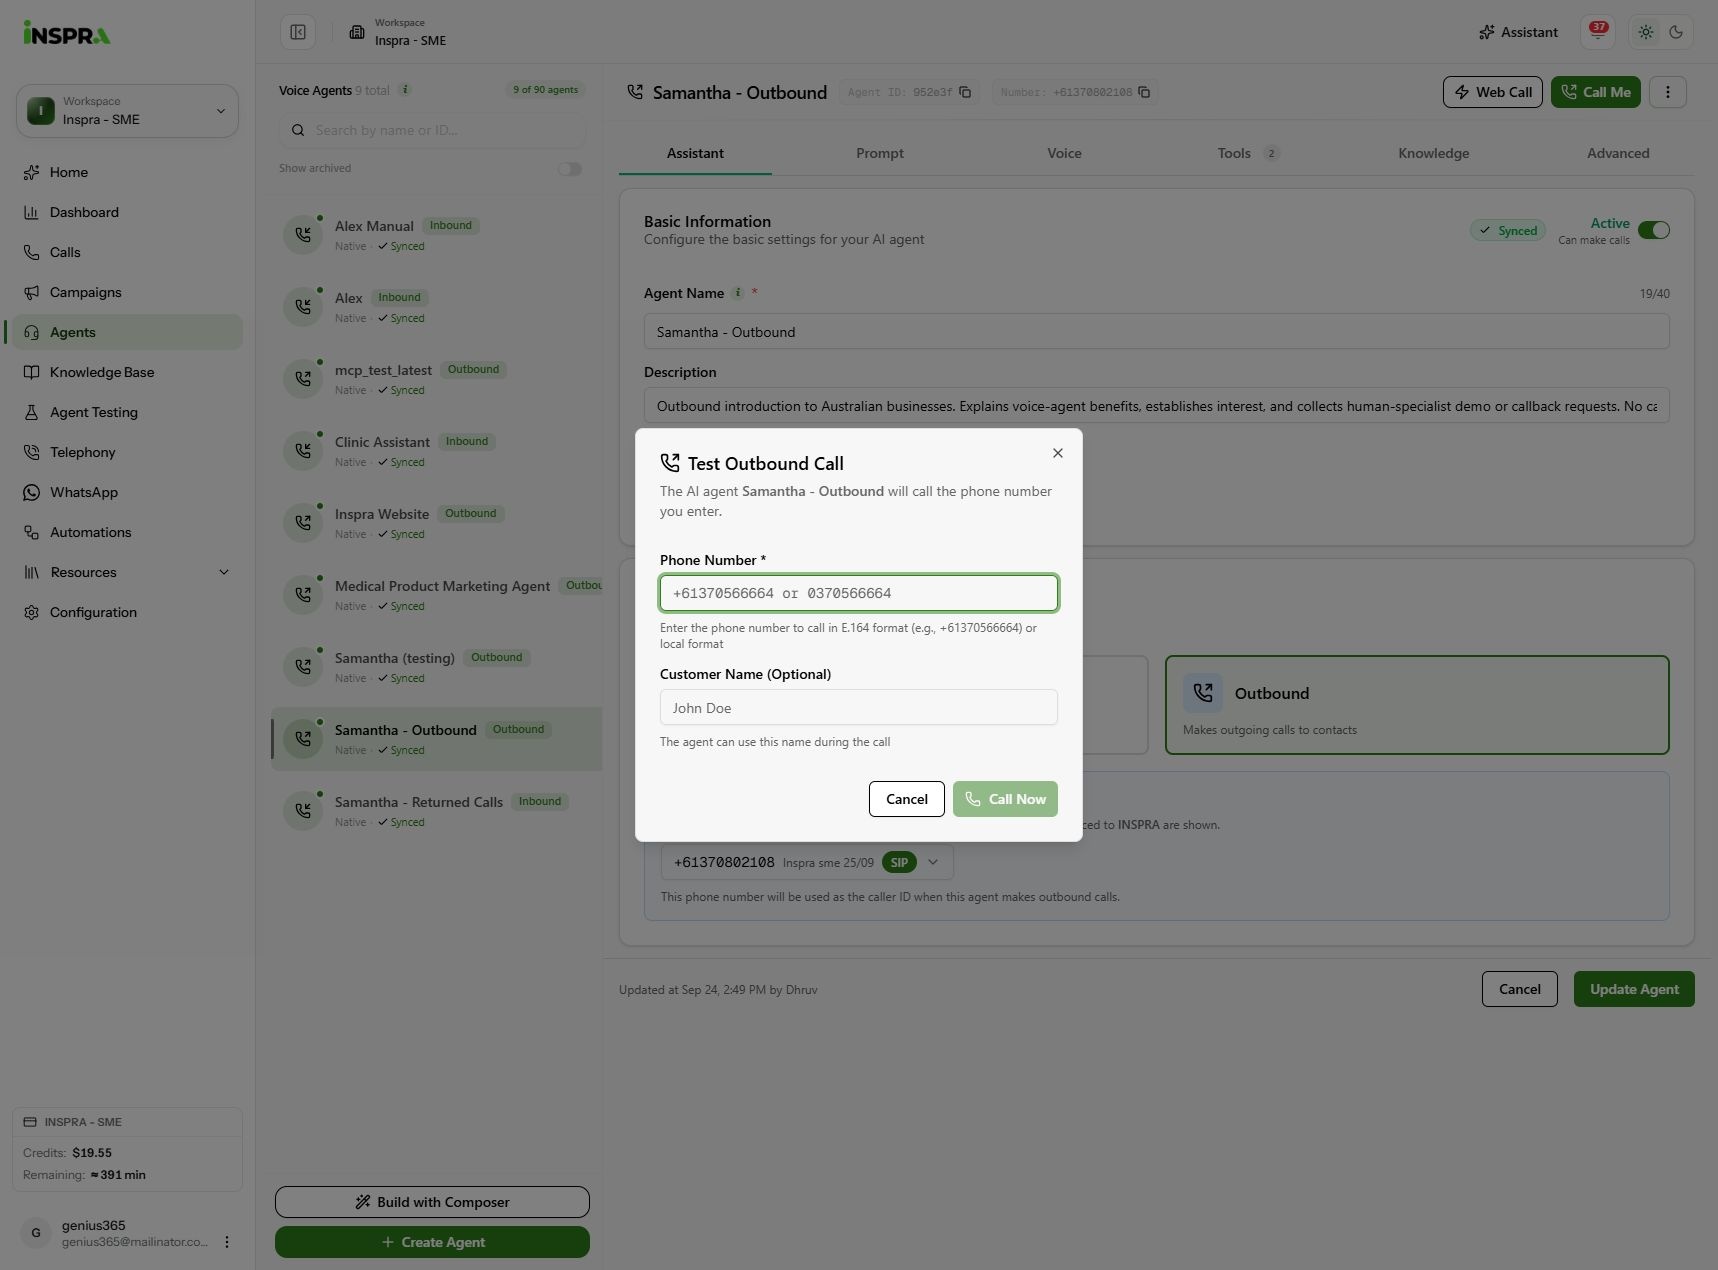
Test Outbound Call: enter the destination number and optional customer name, then click Call Now. No call has been placed in this capture. To place calls from your own system, use the API with a workspace API key:
cURL curl -X POST "$BASE_URL/v1/calls" \ -H "Authorization: Bearer $API_KEY" \ -H "Content-Type: application/json" \ -d '{ "agent_id": "YOUR_AGENT_ID", "to": "+61412345678" }'Reference: Create outbound call. The API quickstart covers keys, variables and reading the result.
Batch calls
Campaigns call a list of recipients instead of dialling them individually. They suit lead reactivation, appointment reminders, surveys and follow-up calls.
- Open Campaigns and click New Campaign.
- Upload a CSV of recipients; it needs a
customer_phonecolumn. - Name the campaign and select the agent. The agent needs an outbound number.
- Set the start time, business hours and holidays.
- Review and click Create Campaign, then follow progress in the campaign list.
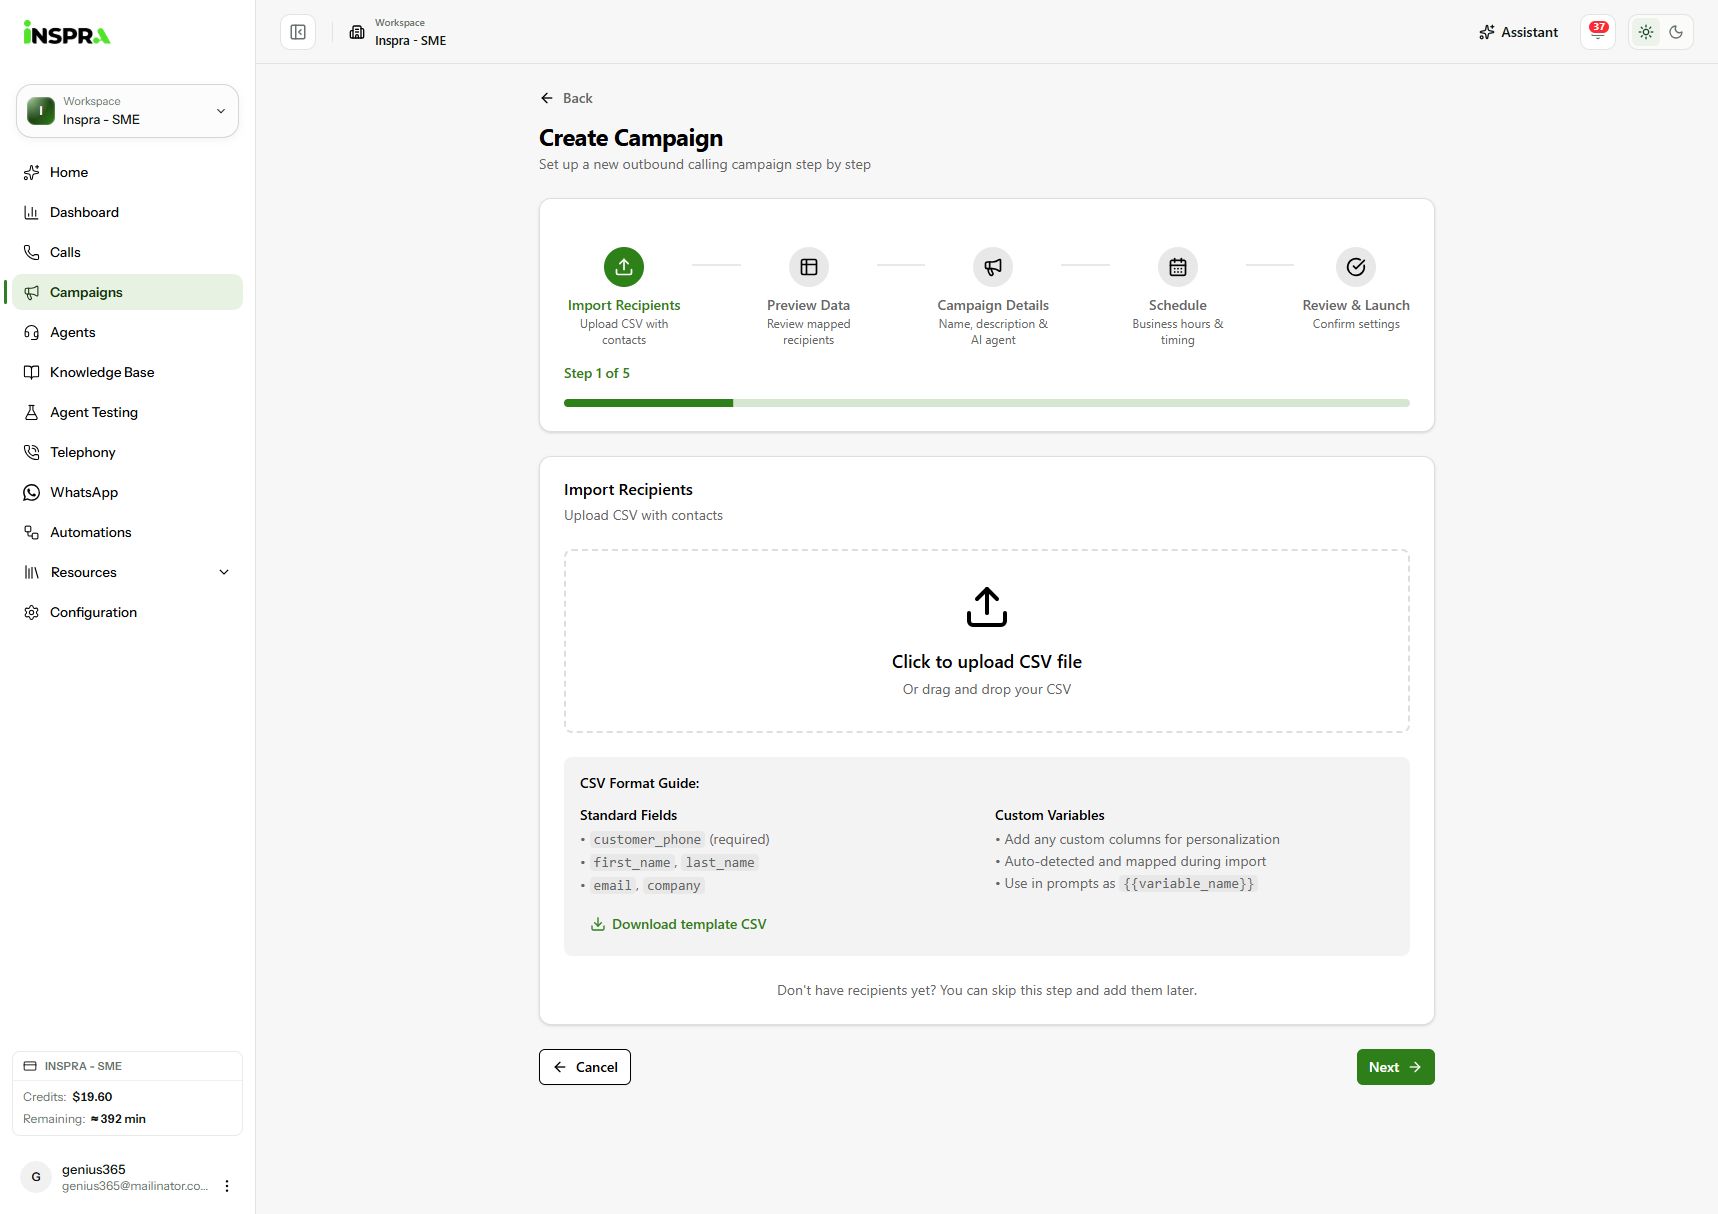
Create Campaign / Import Recipients: upload your CSV, then review the data, agent, schedule and launch settings. The full wizard is in Create campaign.
For large-scale operations, create and control campaigns over the API: Create campaign.
Setting up transfers
Transfers let your agent hand a call to a person when the conversation needs human support, a specialist team or another department. On an Inspra Agent, this is the Transfer Call tool.
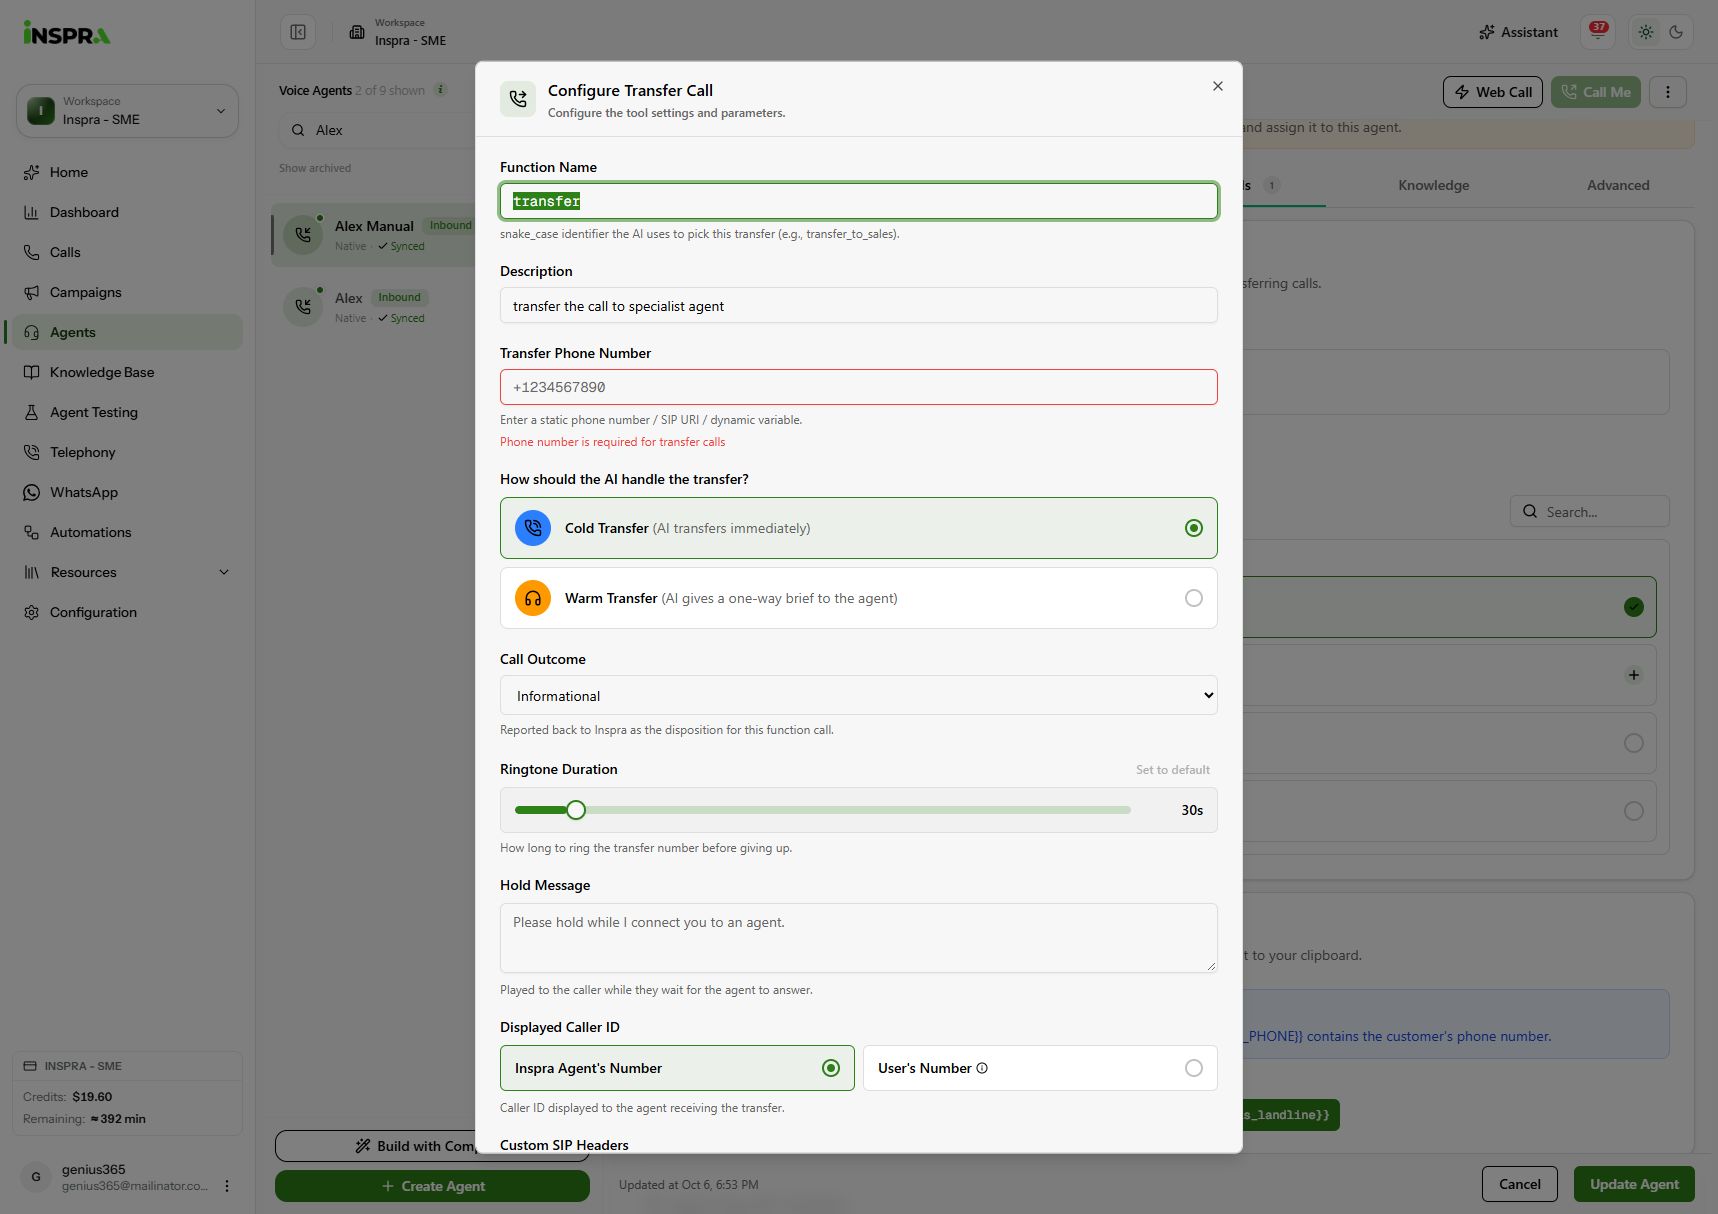
Configure Transfer Call: enter the destination, choose Cold Transfer or Warm Transfer, and review the ringtone, hold message and caller ID. Transfer setup steps
- Open the agent and select its Tools tab.
- Search Built-in Tools and add Transfer Call.
- Choose the transfer type.
- Enter the destination number in international format, for example
+61412345678. - Click Save in the tool dialog. In the prompt, state when the agent should transfer and what to say first.
- Click Update Agent.
Transfer types
- Warm transfer: the agent gives the receiving person a one-way brief before handing over the caller.
- Cold transfer: the agent transfers the caller and disconnects.
Test each transfer destination before going live to confirm it is reachable. Transfer Call is available on Inspra Agents; see Manage agents for what each provider offers.
API integration
This guide uses the dashboard, but the same work can be done over the REST API.
Next steps
With your first agent running, explore these features: